Installing and Using LM Studio on MacOS

The above image was generated using Source: DALLE-3 on 07/03/2025 using prompt “Generate an image highlighting LM Studio.”
Author
- Harshitha Thoram (ORCID: 0009-0007-4527-7926)
Getting Started
In today’s AI-driven world, running Large Language Models (LLMs) on your own computer has never been easier, thanks to LM Studio. Whether you’re a developer, researcher, or just an AI enthusiast, LM Studio provides a seamless way to download, manage, and interact with open-source models—without relying on cloud-based APIs. This guide will walk you through the step-by-step process of installing LM Studio and using it to run LLaMA and other models, ensuring you can start using powerful LLMs locally for privacy, cost savings, and ultimate control over your AI experience.
System Requirements
Before installing LM Studio, make sure your Mac meets the following minimum system requirements:
- Supported Processors: Apple Silicon (M1, M2, M3 chips only)
- Operating System: macOS 13.4 or newer
- Memory (RAM): 16GB+ recommended (8GB Macs may work, but should use smaller models and lower context sizes)
Option 1: Installing LM Studio Using Homebrew
Now that you’ve checked your system requirements, you can install LM Studio easily using Homebrew, the popular package manager for macOS. Follow these simple steps:
Step 1: Install Homebrew (If You Haven’t Already)
/bin/bash -c "$(curl -fsSL https://raw.githubusercontent.com/Homebrew/install/HEAD/install.sh)"
Once installed, confirm Homebrew is working by running the below command and it outputs a version number
brew –version
Step 2: Install LM Studio Through Homebrew
With Homebrew installed, simply run:
brew install lm-studio
This command will download and install LM Studio on your Mac.
Step 3: Launch LM Studio
Once the installation is complete, you can launch LM Studio by: Searching for “LM Studio” in Spotlight (Cmd + Space → type “LM Studio”).
Why Install LM Studio with Homebrew?
- Automatic Dependency Management – Homebrew checks and installs any missing dependencies required for LM Studio to run.
- Easy Updates – You can update LM Studio with a simple command(
brew upgrade lm-studio) - Quick Uninstallation – If needed, remove it cleanly(
brew uninstall lm-studio) - No Manual Setup – No need to download DMG files or manually configure settings.
Option 2: Installing LM Studio via the Official Website
If you prefer a manual installation, follow these steps:
Step 1: Download LM Studio
- Go to the official LM Studio website: LM-Studio
- Click on the macOS version to download the
.dmgfile.
Step 2: Install LM Studio
- Open the downloaded
.dmgfile. - Drag and drop LM Studio into the Applications folder.
- Eject the installer after installation.
Step 3: Open LM Studio
- Go to Applications and double-click LM Studio.
- Or search “LM Studio” in Spotlight (
Cmd + Space).
How to Use LM Studio to Run different AI models
Now that LM Studio is installed, you can start running LLMs locally!
Here’s how to set it up:
Once you open LM Studio,enable the developer mode at the bottom of the screen as shown so advanced features for managing models are unlocked

Step 1: Discover and Download Models
From the navigation bar, go to “Discover”. This section lists available LLMs from Hugging Face, where you can as shown from the below image:
- Sort models by Most Likes, Most Downloads, or Recently Updated.
- Click on a model to see detailed information (like creator, number of parameters used in training, RAM requirements, quantisation units, etc.)
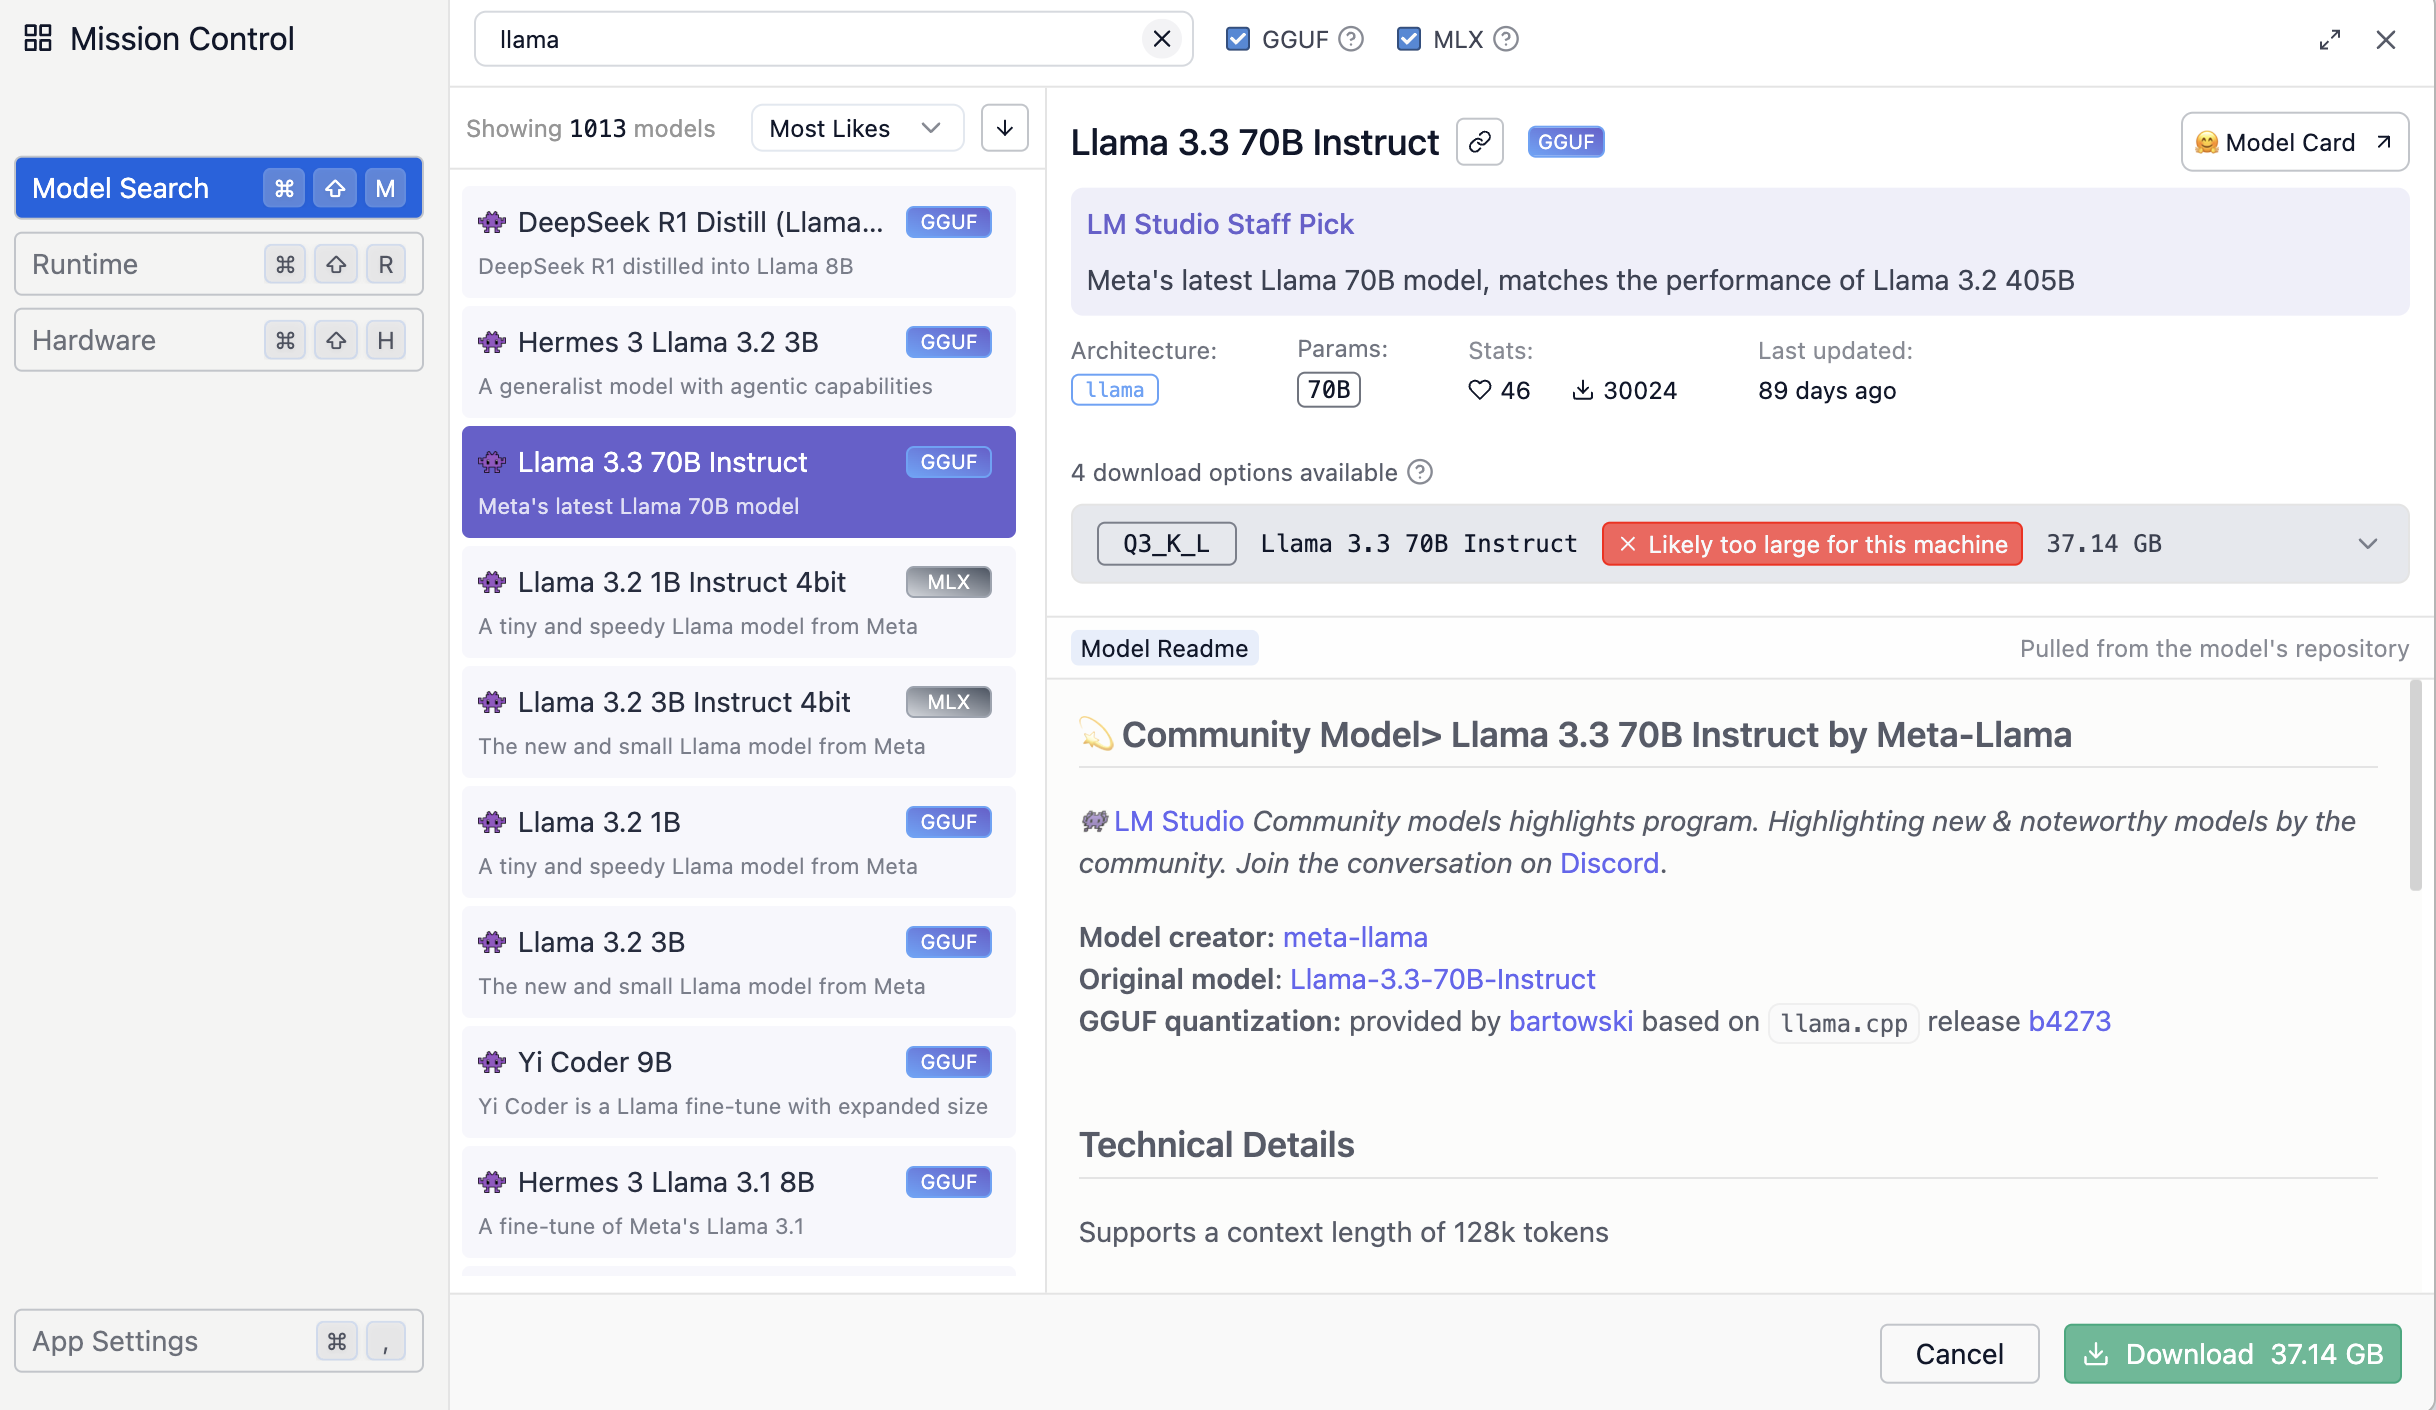
Step 2: Search and Download a Model
If you’re looking for a specific model, use the search bar. Let’s say we want to install hermes-3-llama-3.2-3b
GGUF:
- Search “LLaMA” in the Discover tab.
- Select hermes-3-llama-3.2-3b.
- Click Download.
- Wait for the model to install.
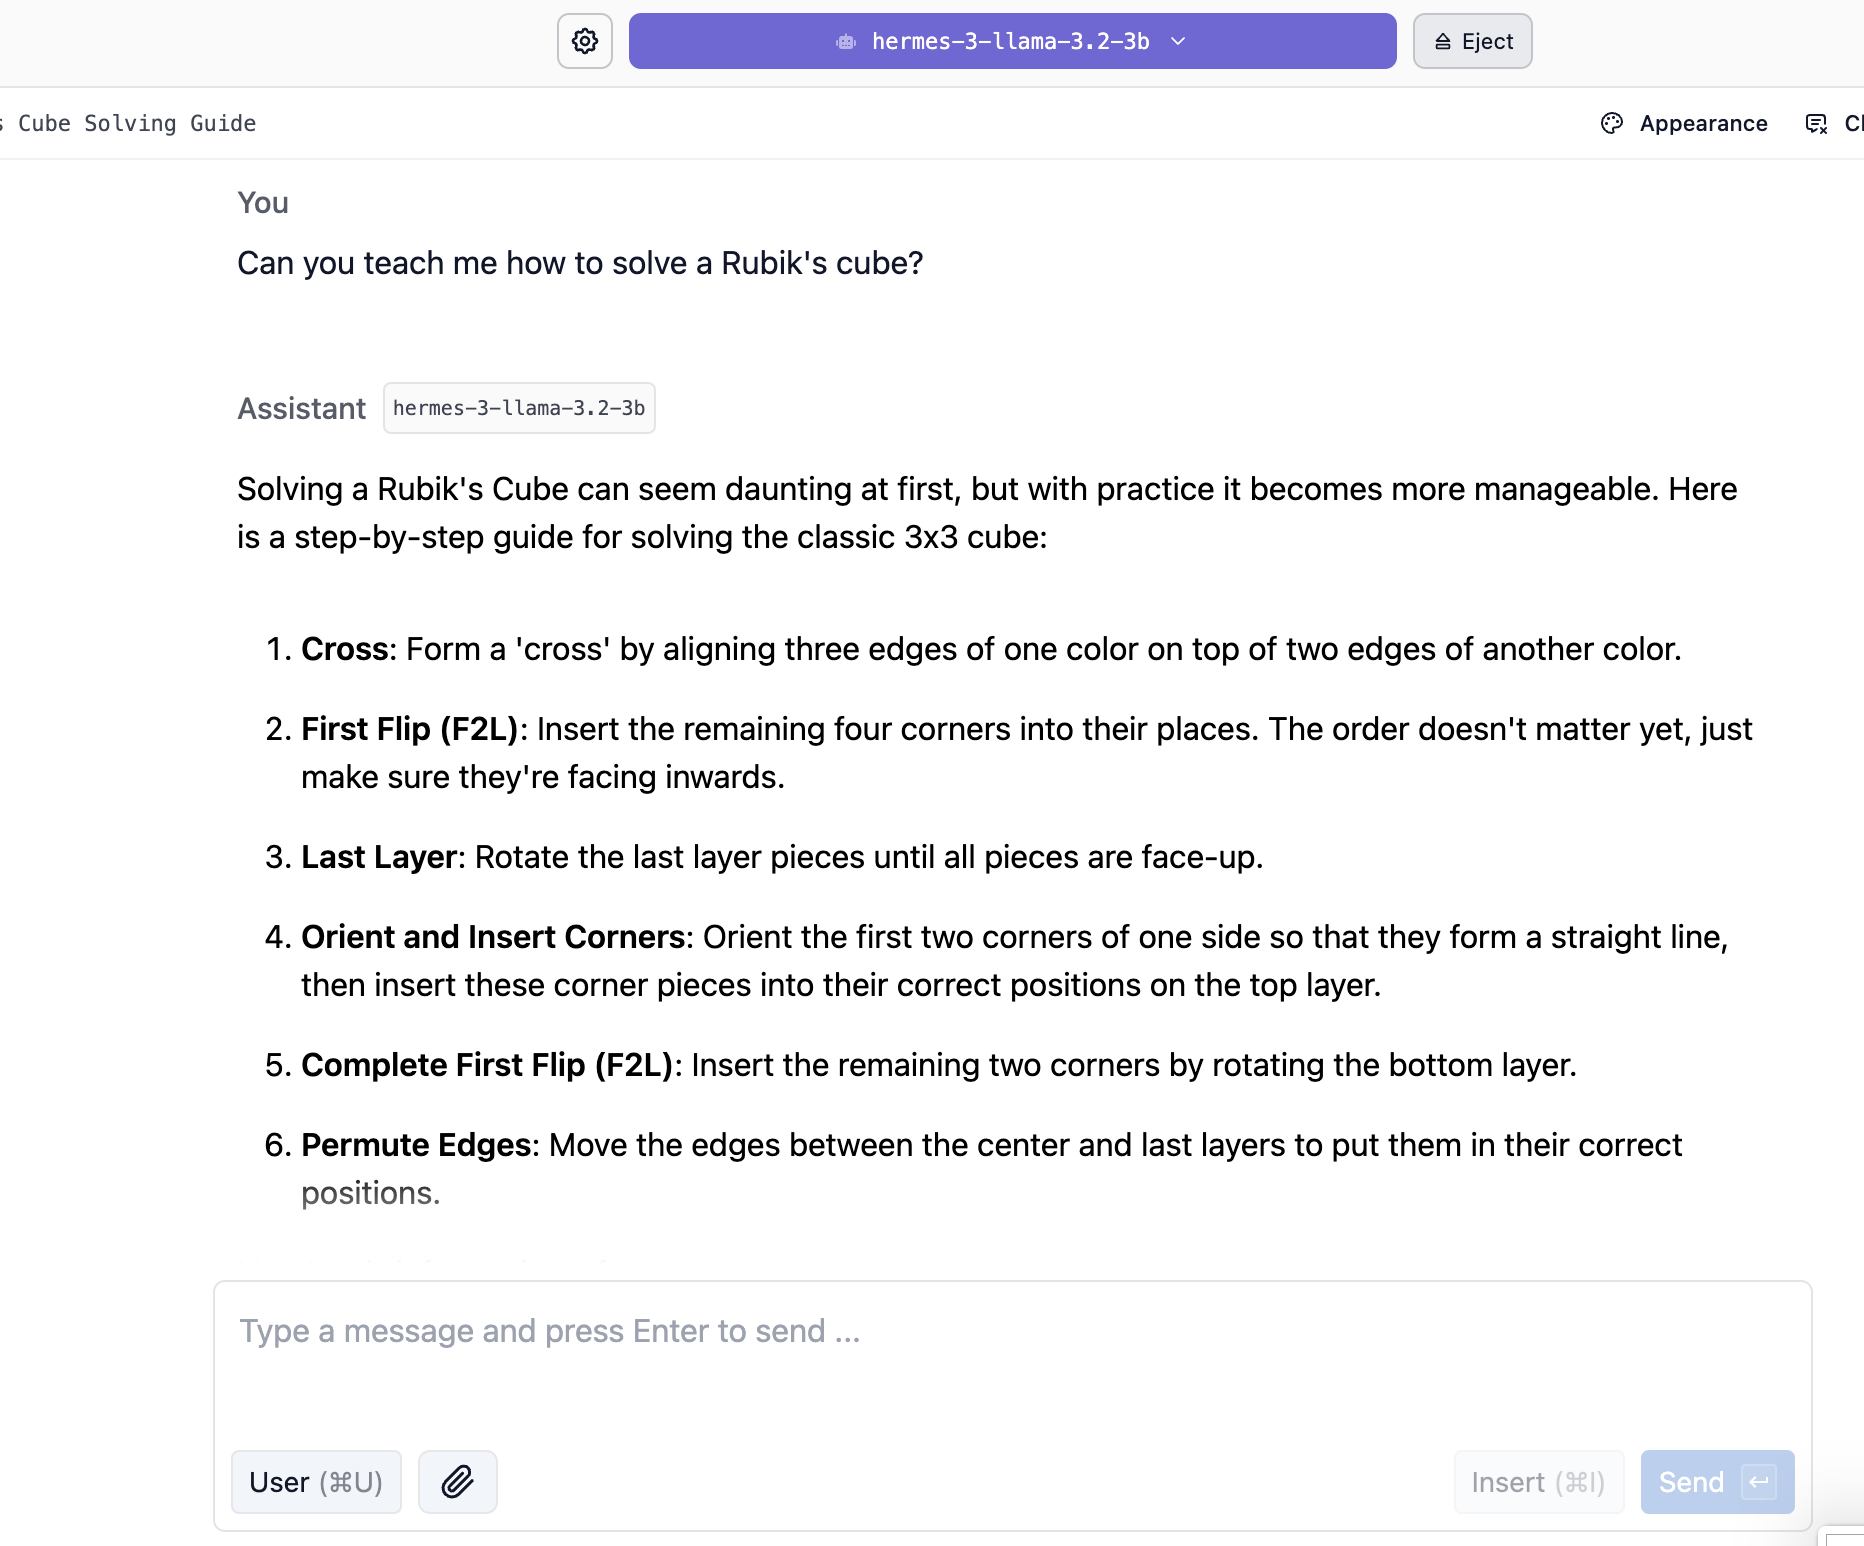
Step 3: Load the Model and Start Using It
- Once downloaded, go to “Local Models” in LM Studio.
- Select the model and click Load Model.
- Ensure the server is running.
- You can now start prompting and use the LLM for questions, creative writing, coding assistance, and more!
Final Thoughts
With LM Studio installed, you now have full control over running powerful LLMs locally—without depending on cloud-based APIs. Whether you’re experimenting with AI, developing new applications, or ensuring privacy-friendly AI workflows, LM Studio provides an easy and efficient way to work with open-source models.
References
lmstudio.ai. (n.d.). LM Studio – Discover and run local LLMs. [online] Available at: https://lmstudio.ai/.
OpenAI (2024). DALL·E 3. [online] Openai.com. Available at: https://openai.com/index/dall-e-3/.