This image is sourced from Forest Admin on [Forest Admin] (https://www.forestadmin.com/blog/unleashing-the-power-of-automation-bringing-n8n-to-forest-admin/) Automation Visualization.
Author: Immanuel Alvaro Bhirawa (ORCID ID: 0009-0009-3354-7794)
Welcome back, readers! In my previous post, I guided you through setting up an LLM pipeline using n8n and Ollama, all hosted locally (catch up here: How to install n8n and create an LLM pipeline using Ollama & Docker! (For Windows)). Today, we’re elevating that foundation by creating an automated email system that integrates n8n’s AI Agent with Outlook. This system will detect new emails in your Outlook inbox, generate tailored responses using AI, and send them back—all without manual intervention. Whether you’re streamlining customer support, managing team communications, or automating personal tasks, this workflow has you covered!
Here’s the plan:
- Trigger the workflow automatically when a new email arrives in Outlook.
- Generate a response using an AI Agent powered by a locally hosted LLM.
- Send the response via Outlook, completing the automation loop.
Let’s get started!
Assumptions Moving Forward
Before we dive in, ensure these prerequisites are in place:
- Docker is installed on your local machine.
- n8n is running locally (preferably via Docker).
- Ollama is set up in Docker to host the LLM for the AI Agent.
- Outlook credentials are configured in n8n via Azure (details below).
If any of these are missing, refer to my previous guide for setup instructions. With that sorted, let’s build the system!
Setting Up Outlook Credentials in n8n via Azure
To use the Outlook Trigger node in n8n, you need to configure credentials through Azure. Here’s how to do it step-by-step:
- Sign Up/Log In to Azure:
- Go to the Azure Portal and sign in with your account.
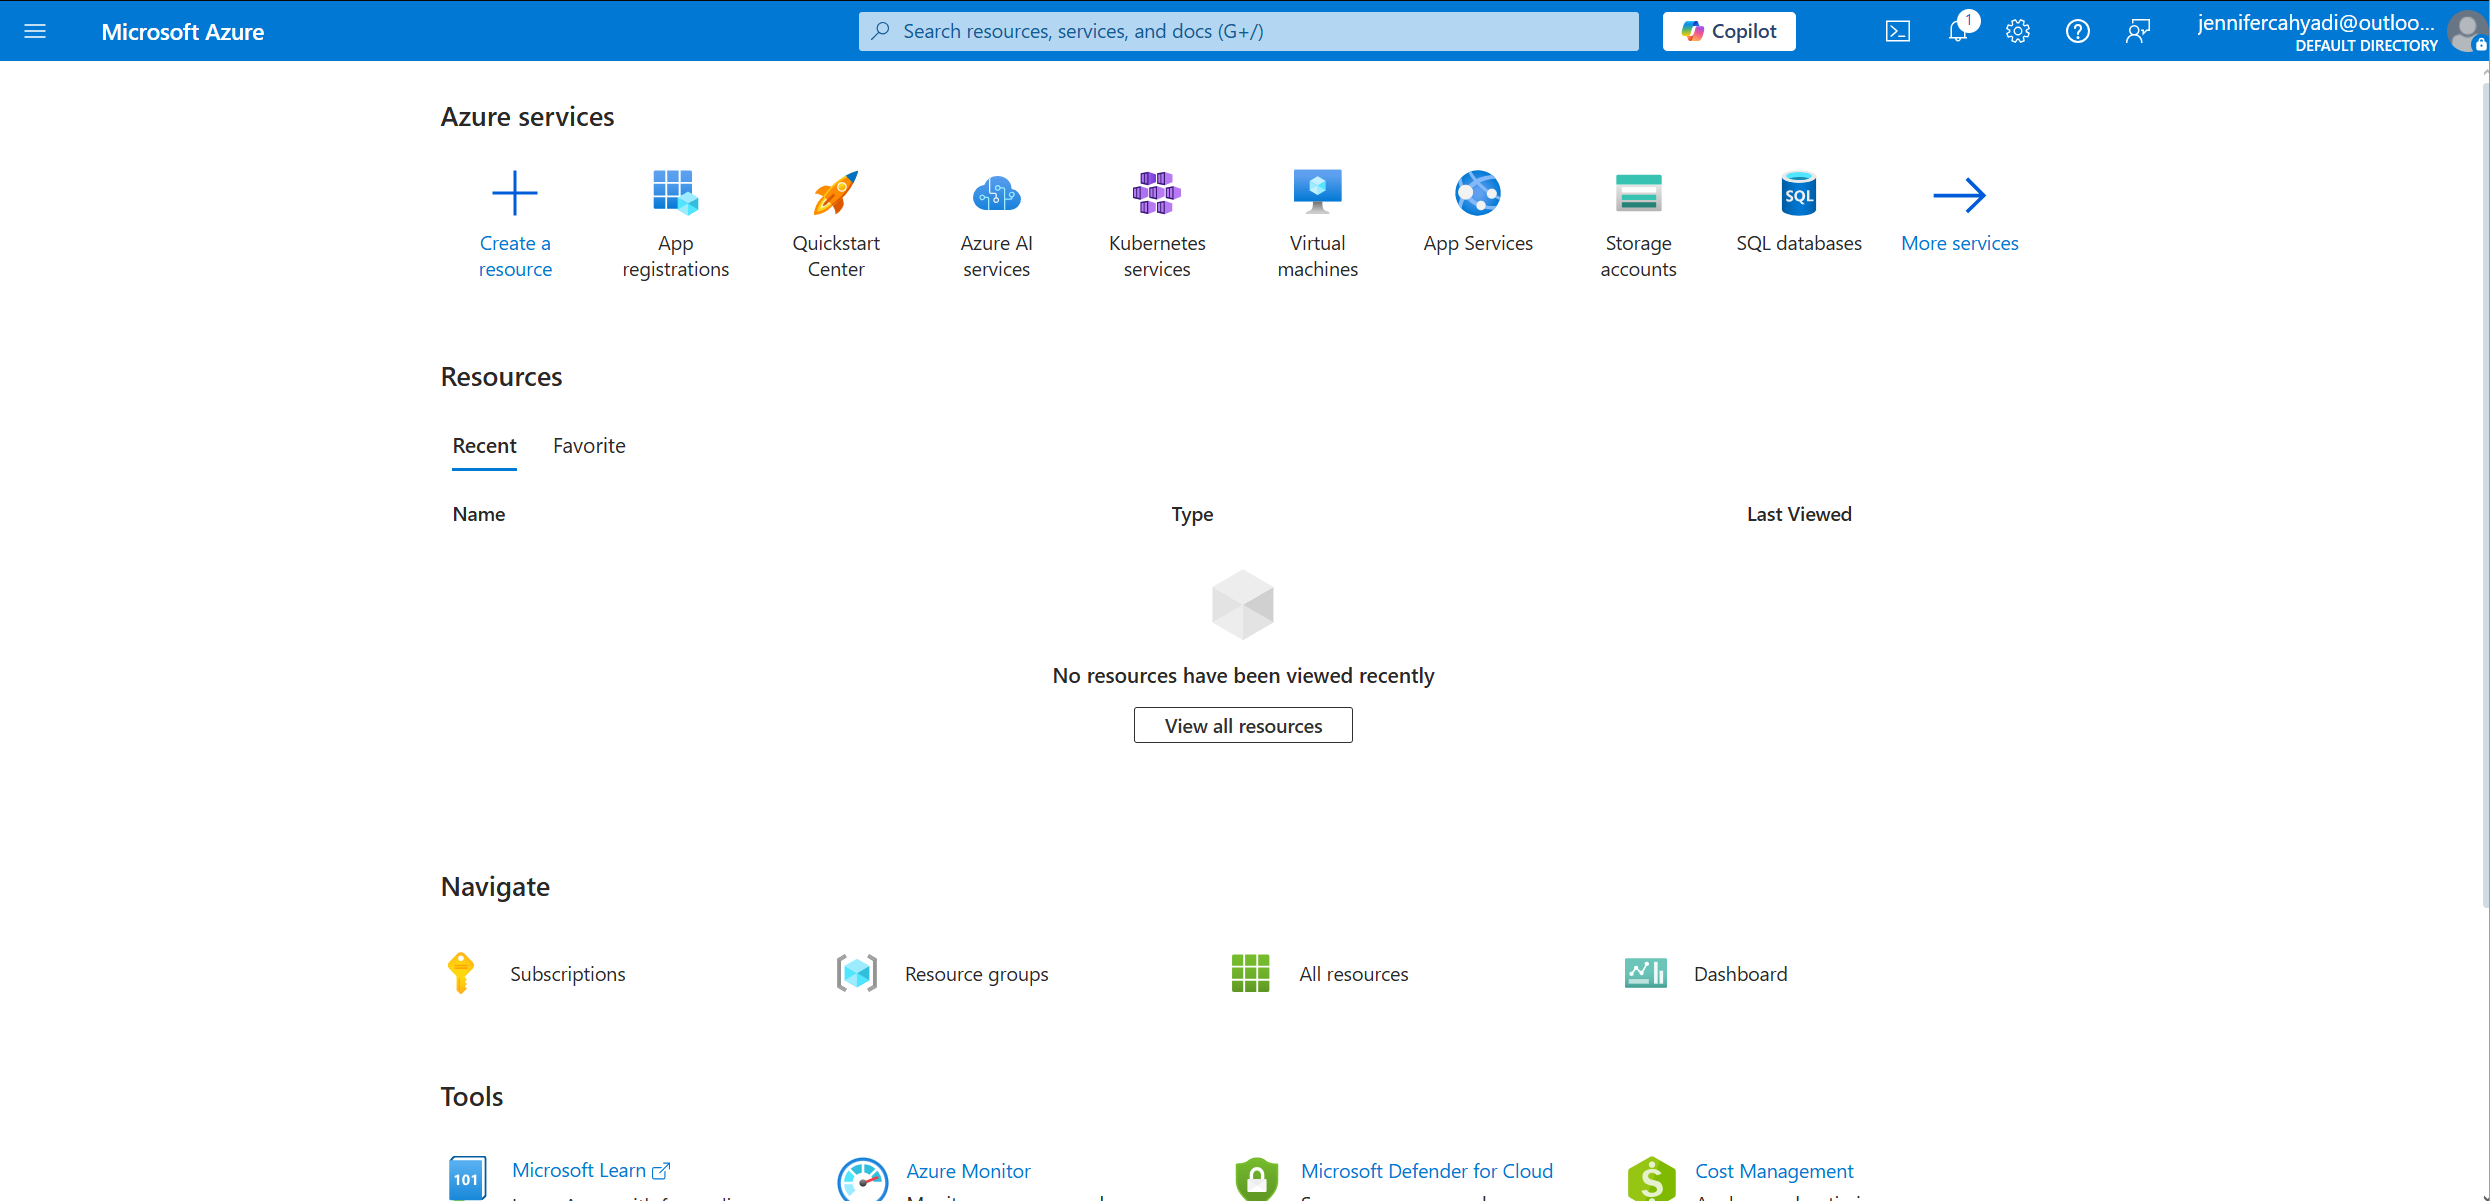
This image is generated by author sourced from Microsoft Azure on [Microsoft Azure] (https://portal.azure.com/#home) Microsoft Azure Portal.
- Register a New App:
- Navigate to App registrations in the Azure dashboard.
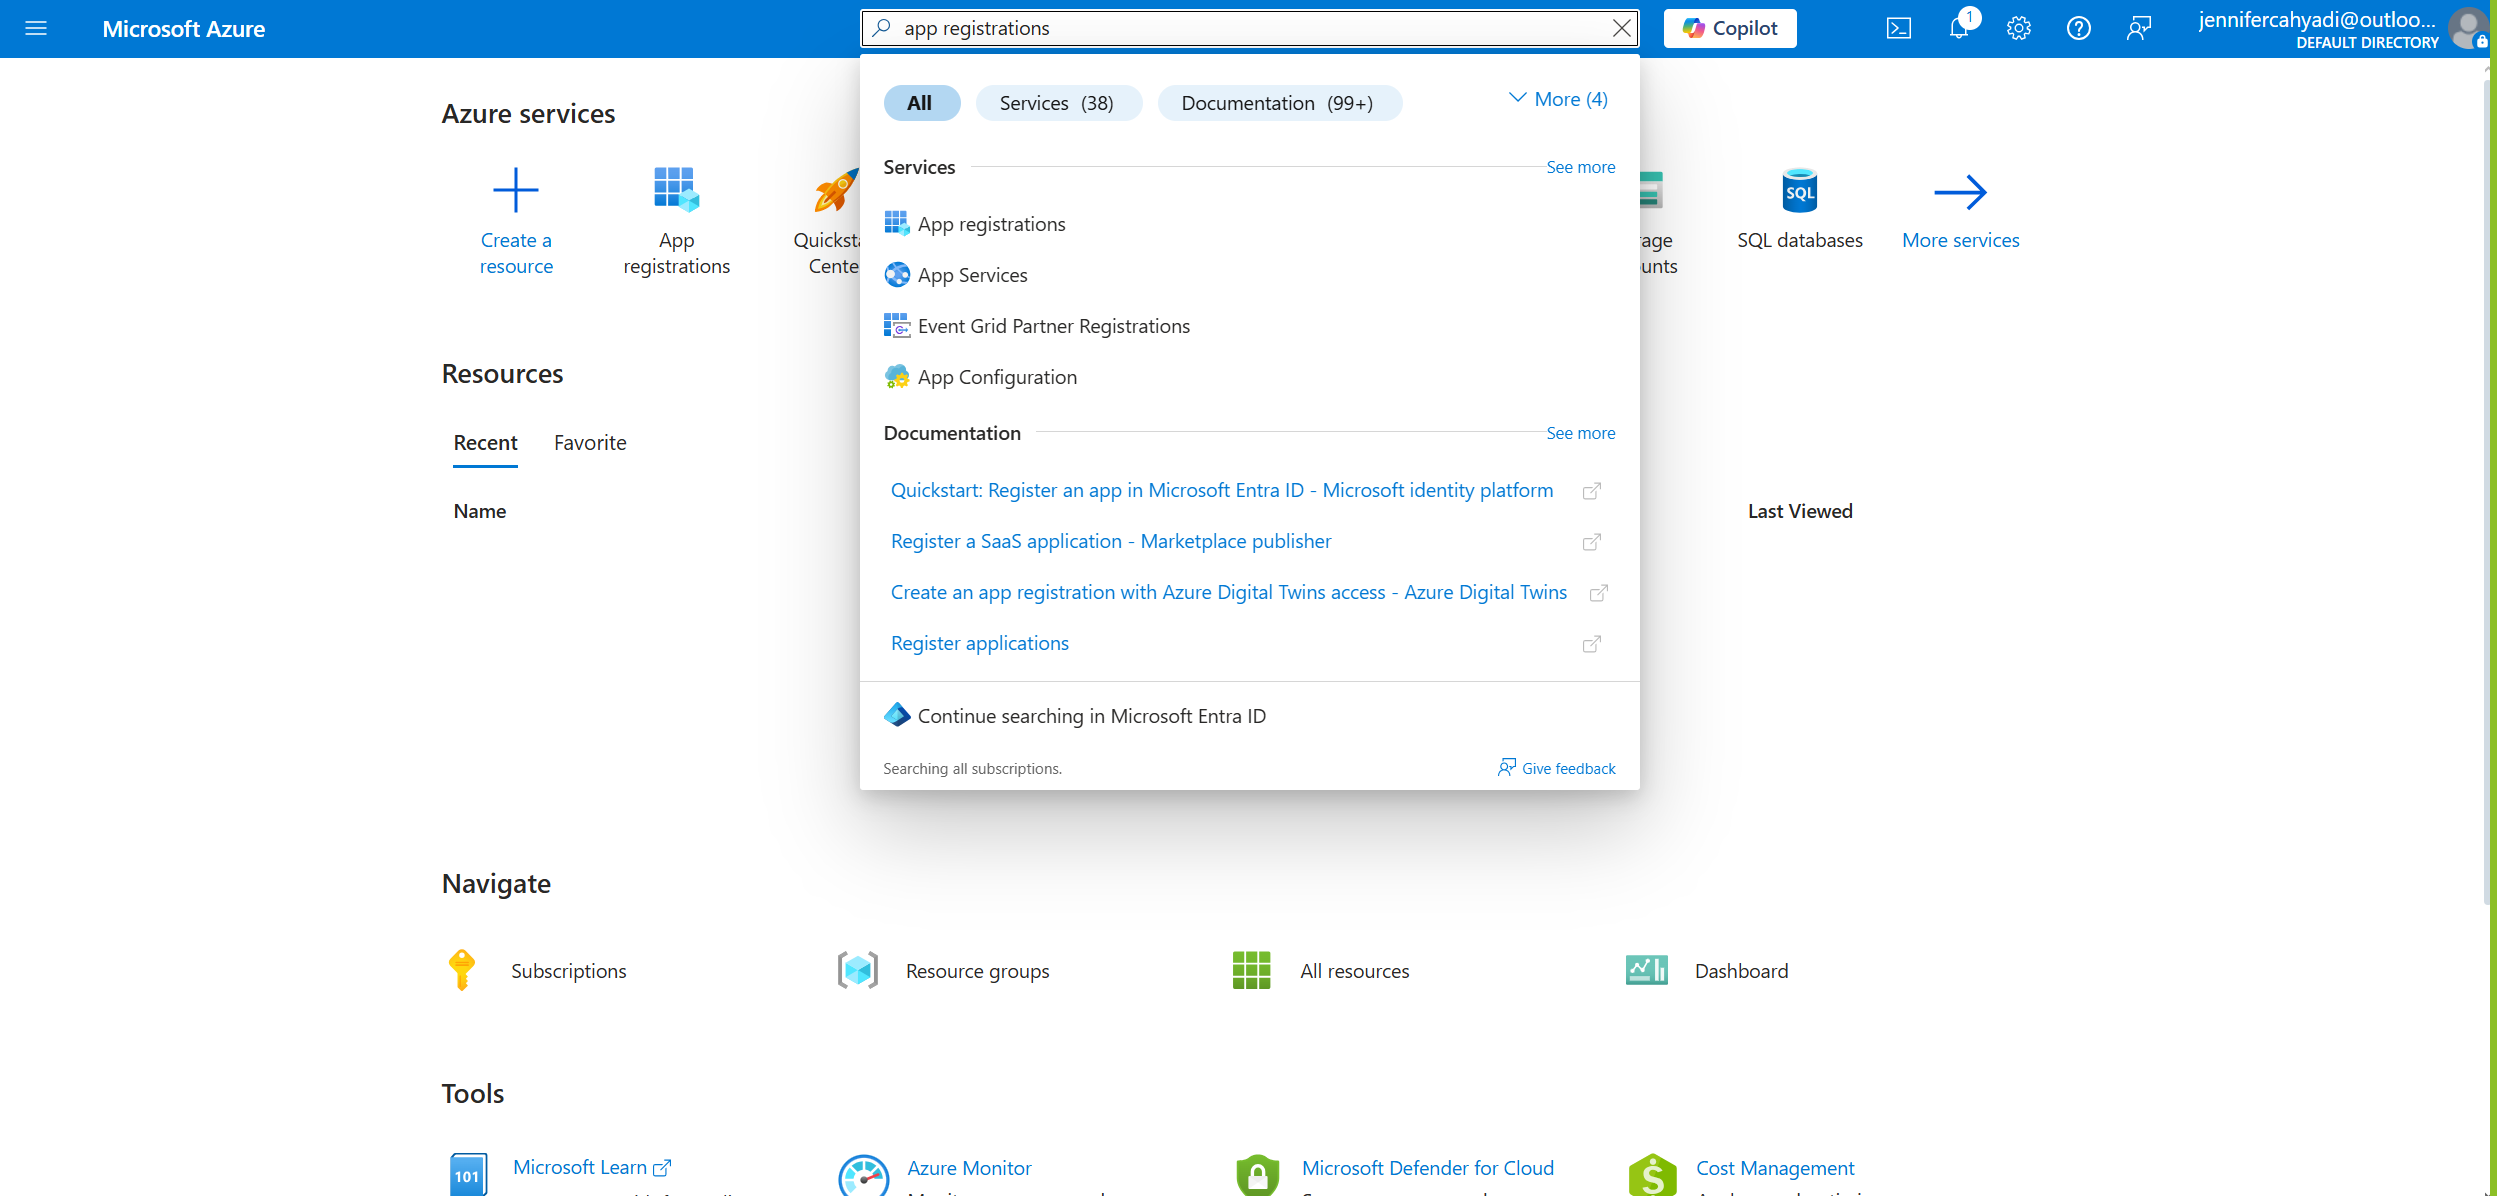
This image is generated by author sourced from Microsoft Azure on [Microsoft Azure] (https://portal.azure.com/#home) Microsoft Azure Portal.
- New Registration
- Click New registration.
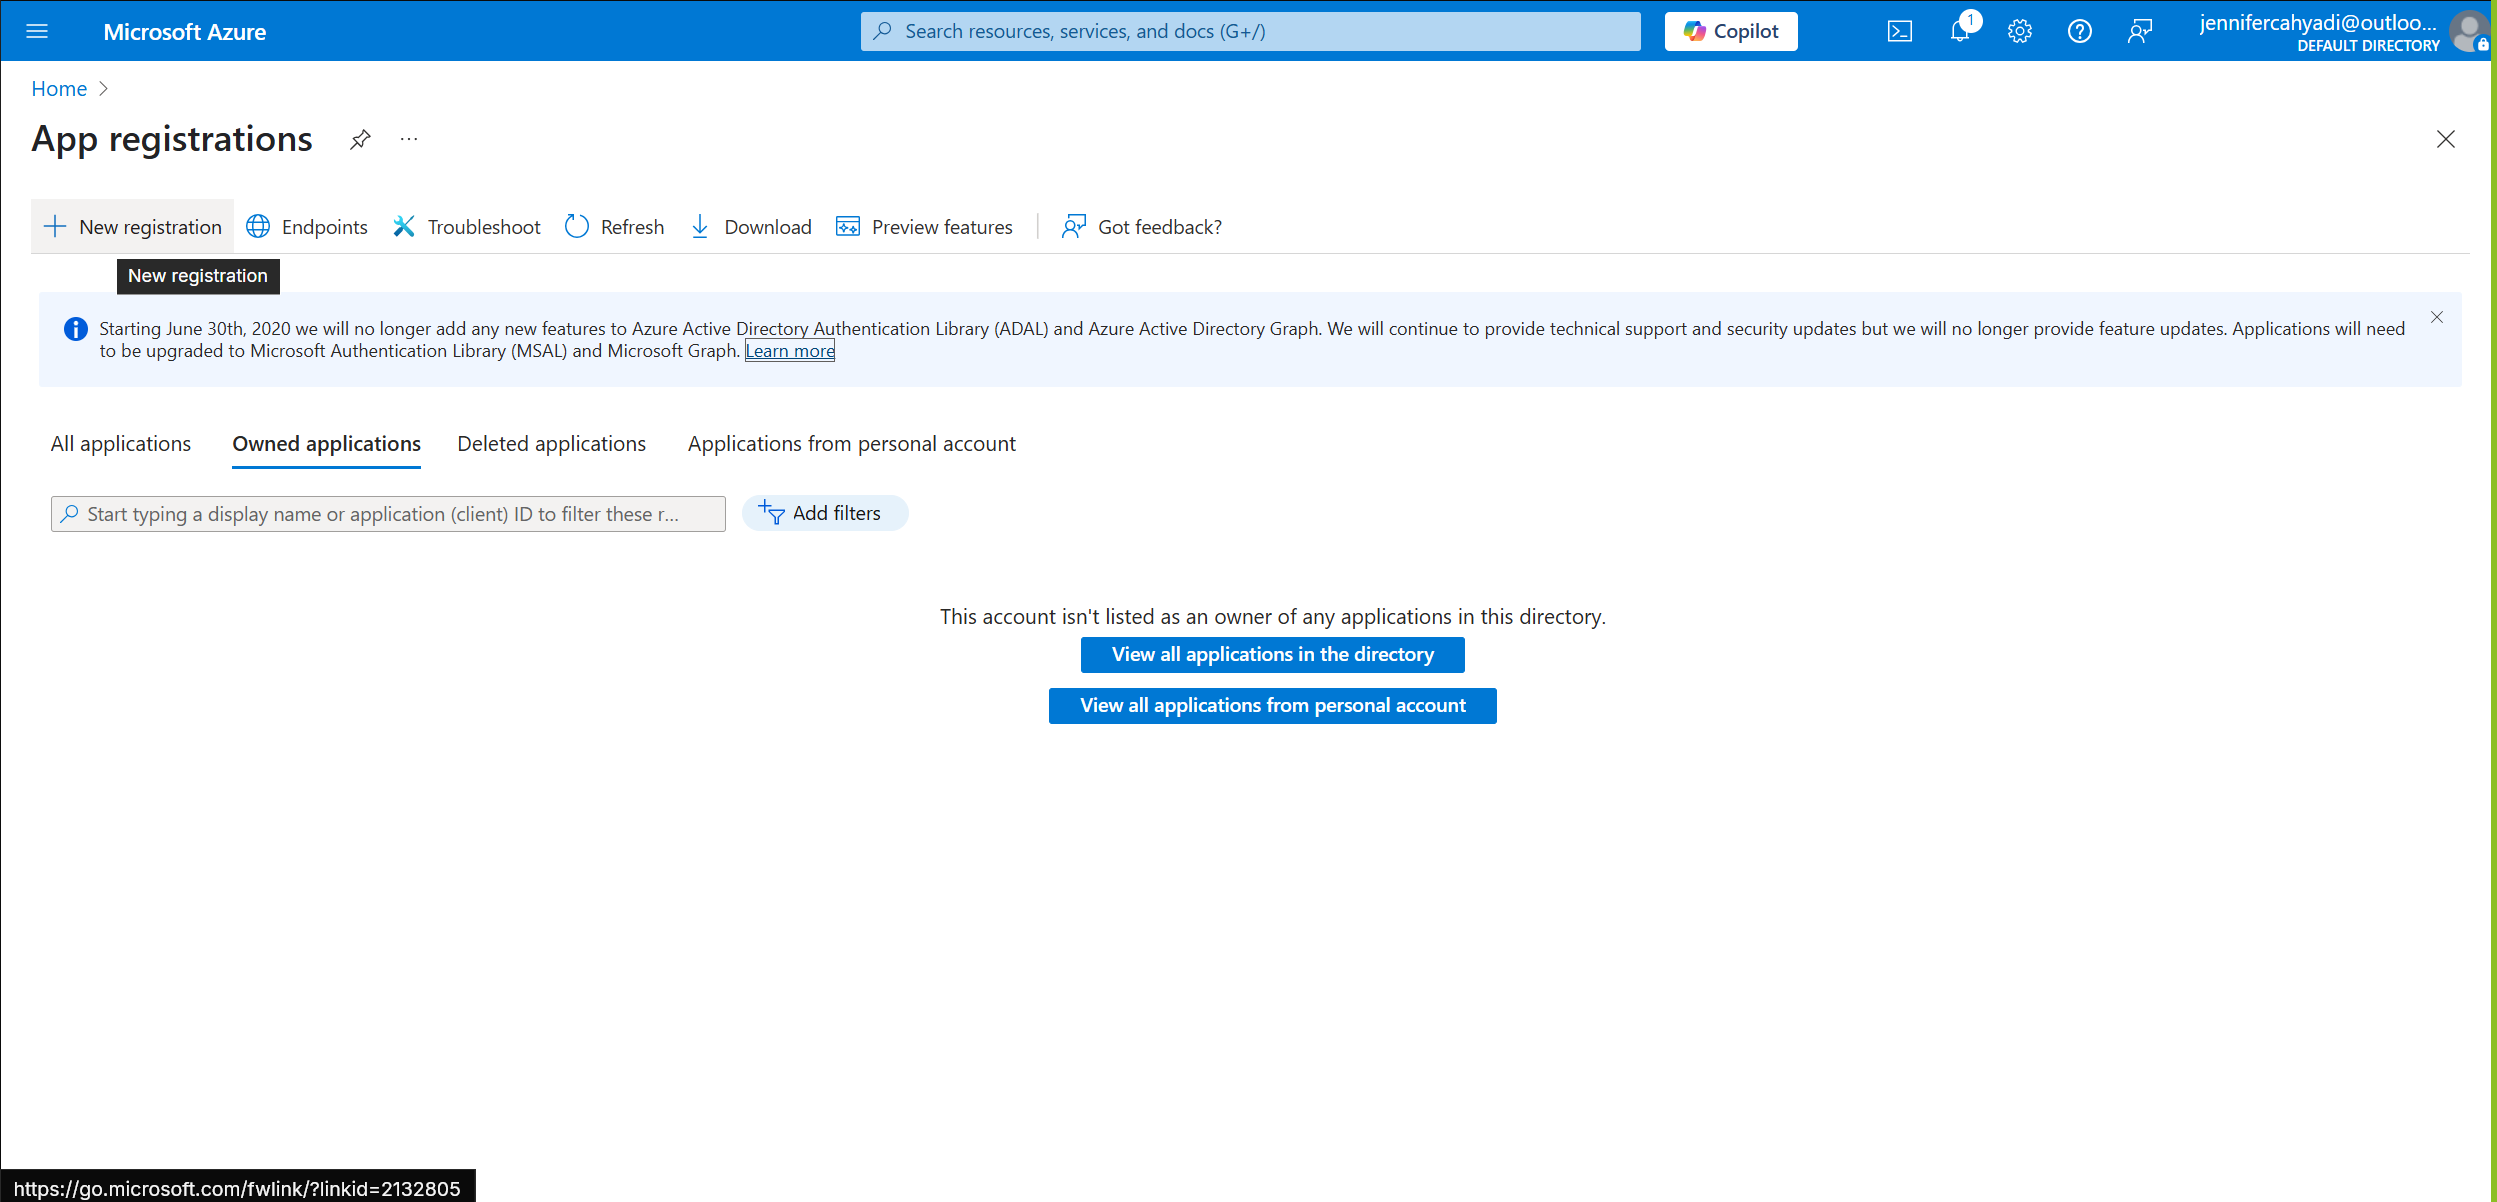
This image is generated by author sourced from Microsoft Azure on [Microsoft Azure] (https://portal.azure.com/#view/Microsoft_AAD_RegisteredApps/ApplicationsListBlade) Microsoft Azure Portal.
- Fill in the app details
- Name your app (e.g., “n8n” or any name you prefer).
- Select the appropriate account type (typically “Accounts in any organizational directory”).
- Set the Redirect URI to
http://localhost:5678/oauth-callback(default for n8n). - Click Register.
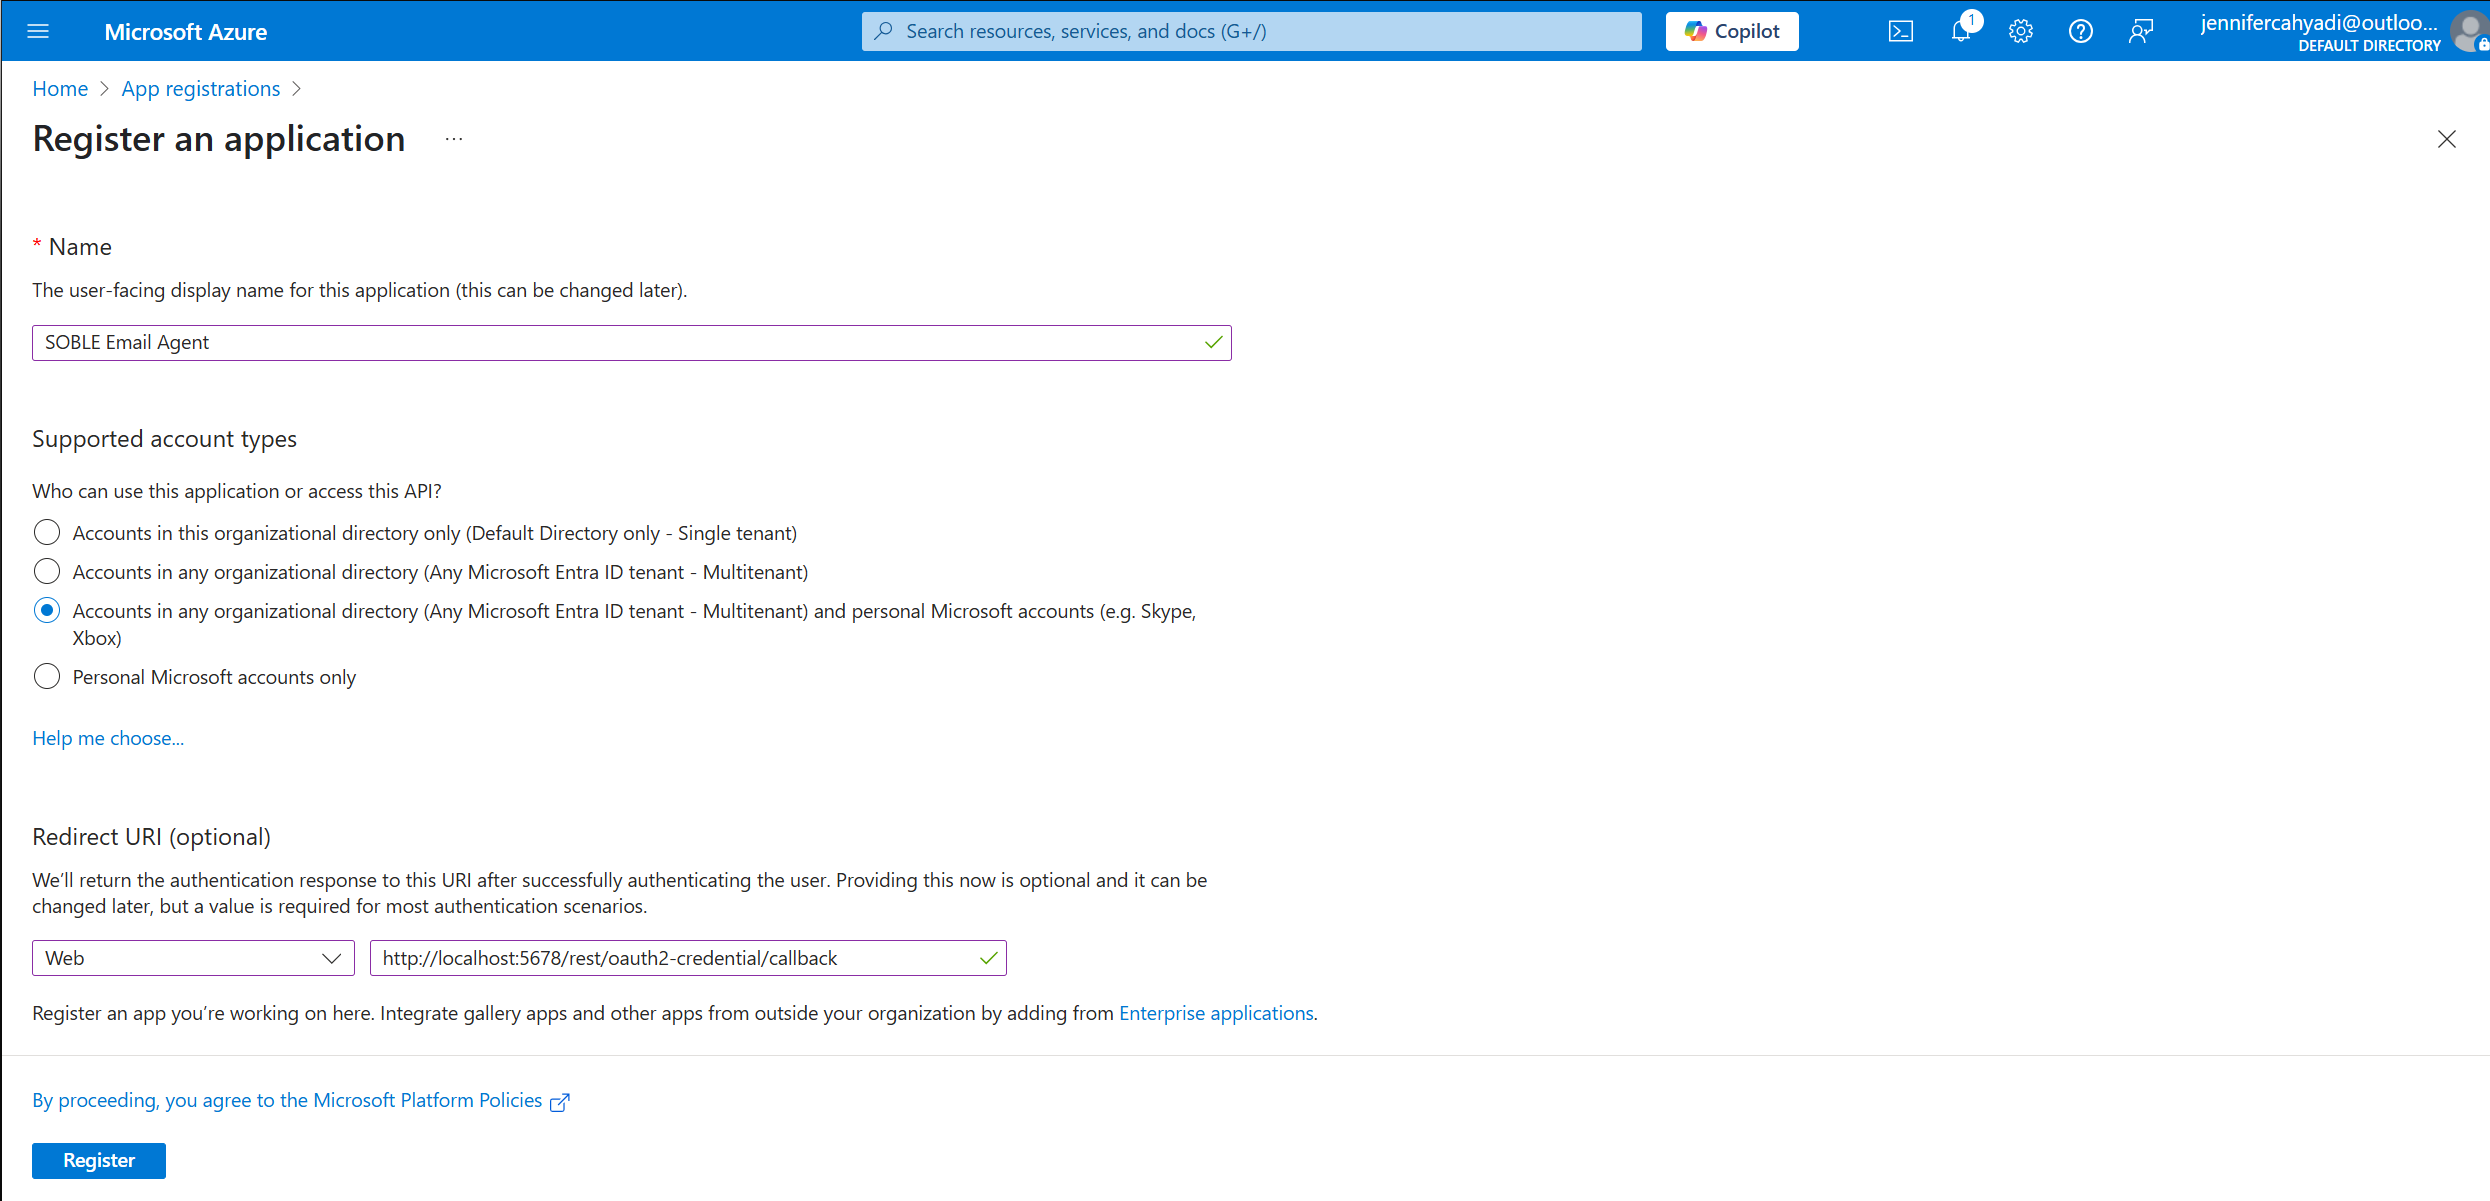
This image is generated by author sourced from Microsoft Azure on [Microsoft Azure] (https://portal.azure.com/#view/Microsoft_AAD_RegisteredApps/CreateApplicationBlade/quickStartType~/null/isMSAApp~/false) Microsoft Azure Portal.
- Delegate Permissions:
- In your app, go to API permissions.
- Click Add a permission, then select Microsoft Graph.
- Choose Delegated permissions and add Mail.Read (to read emails).
- Optionally, add Mail.Send if you plan to send emails via Outlook later.
- Save and grant admin consent if required.
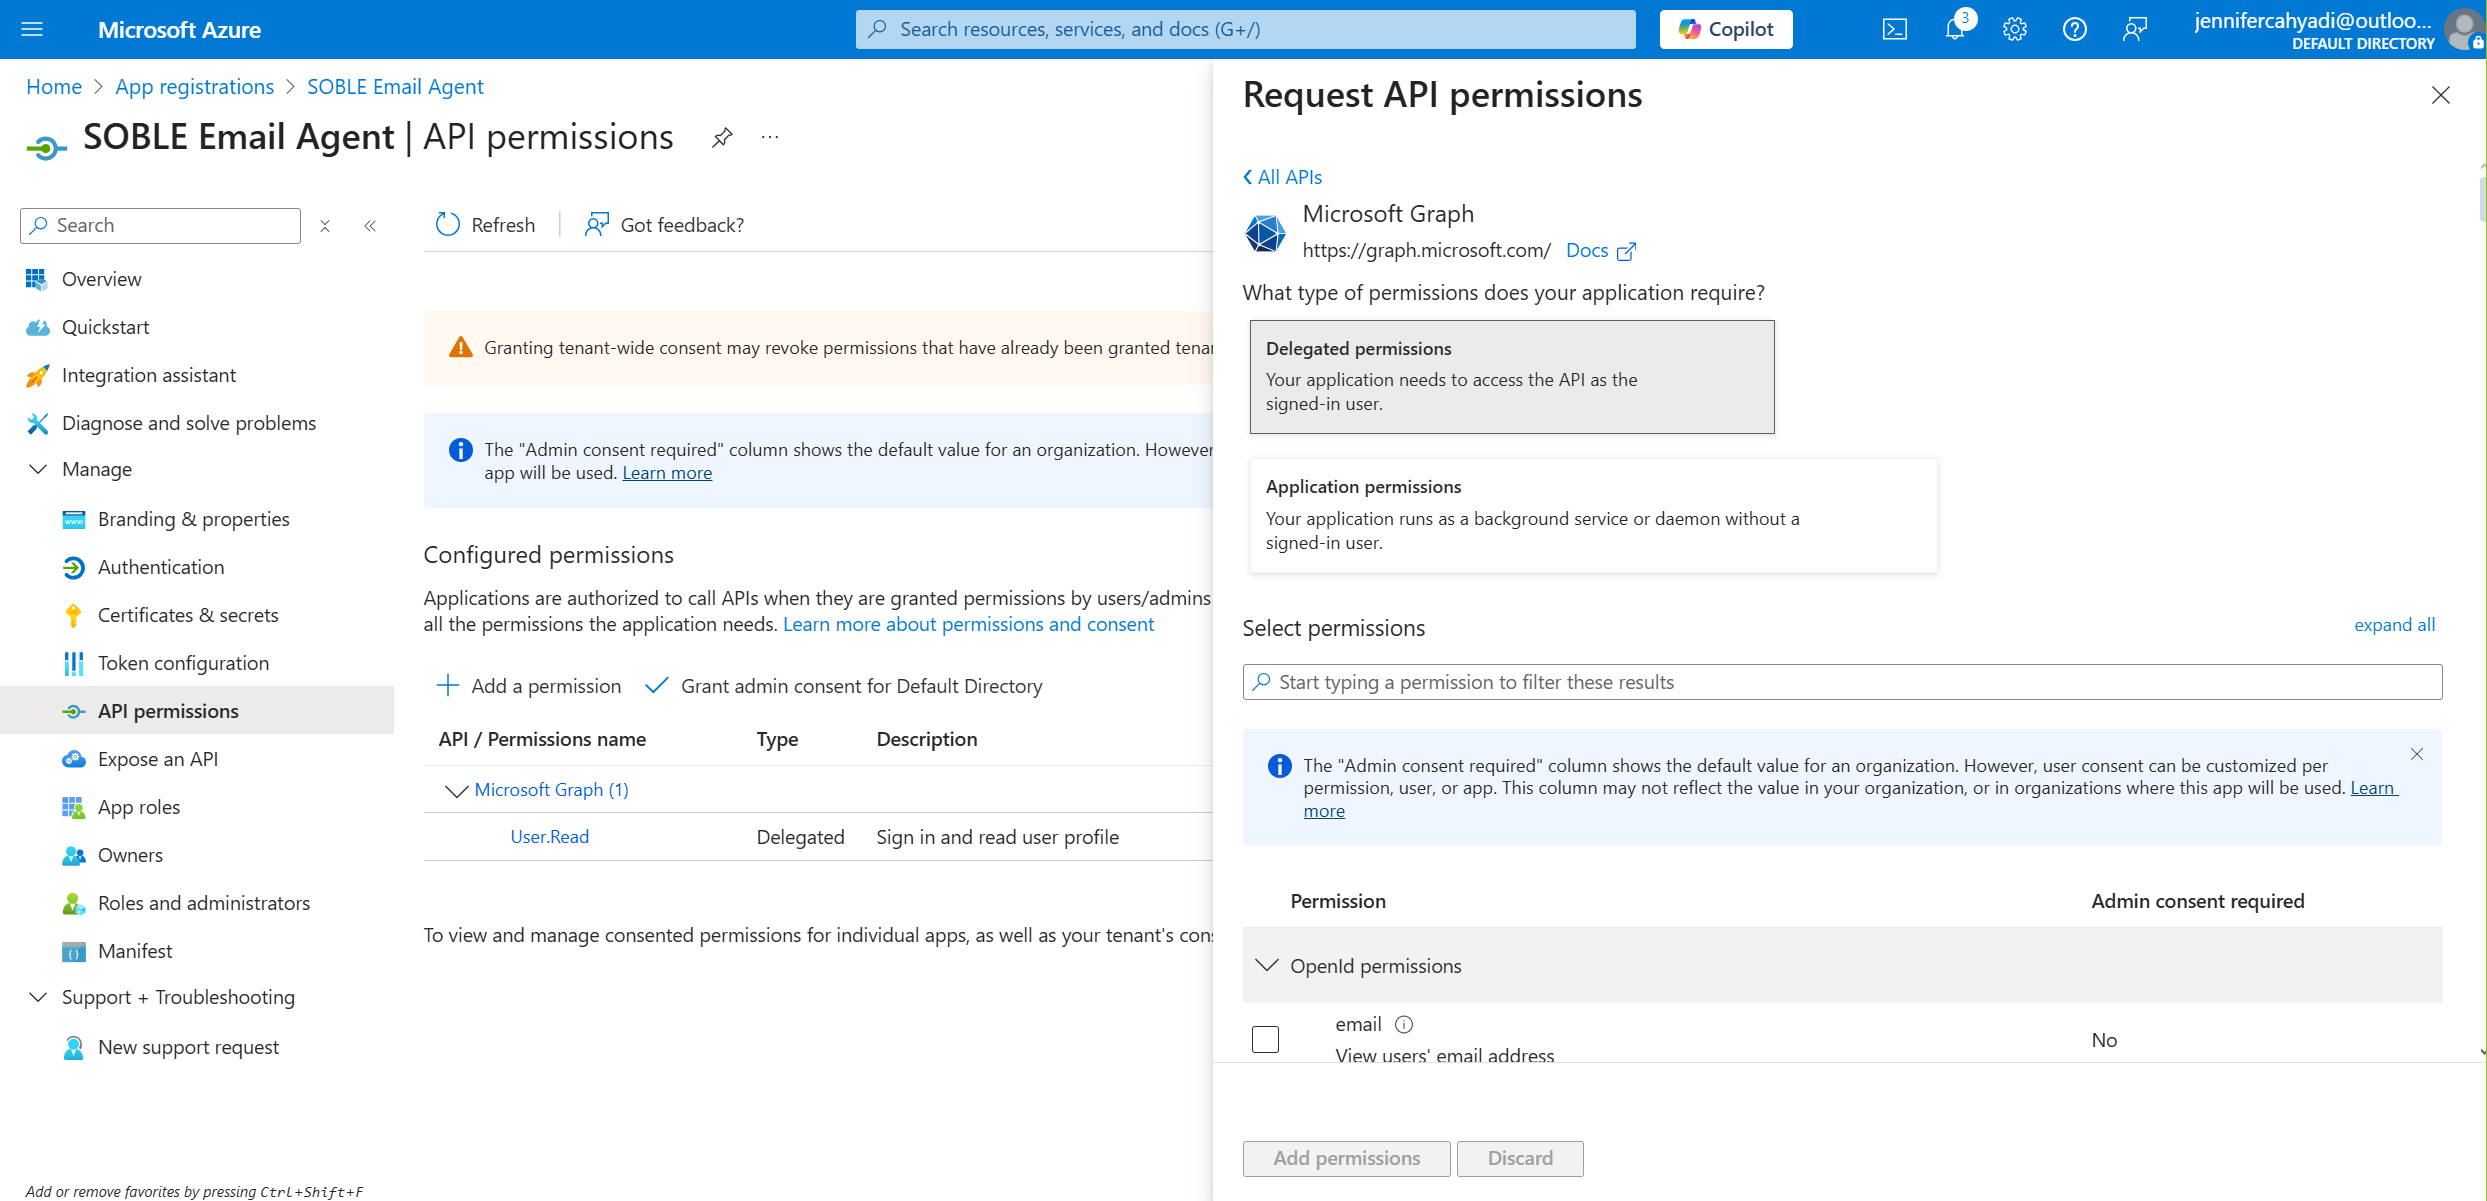
This image is generated by author sourced from Microsoft Azure on [Microsoft Azure] (https://portal.azure.com/#view/Microsoft_AAD_RegisteredApps/ApplicationMenuBlade/~/CallAnAPI/appId/6473cda1-0421-4dfd-80d3-236fe1a79222/objectId/7f1b636b-83a5-4610-8177-2f577f061f29/isMSAApp~/false/defaultBlade/Overview/appSignInAudience/AzureADandPersonalMicrosoftAccount/servicePrincipalCreated~/true) Microsoft Azure Portal.
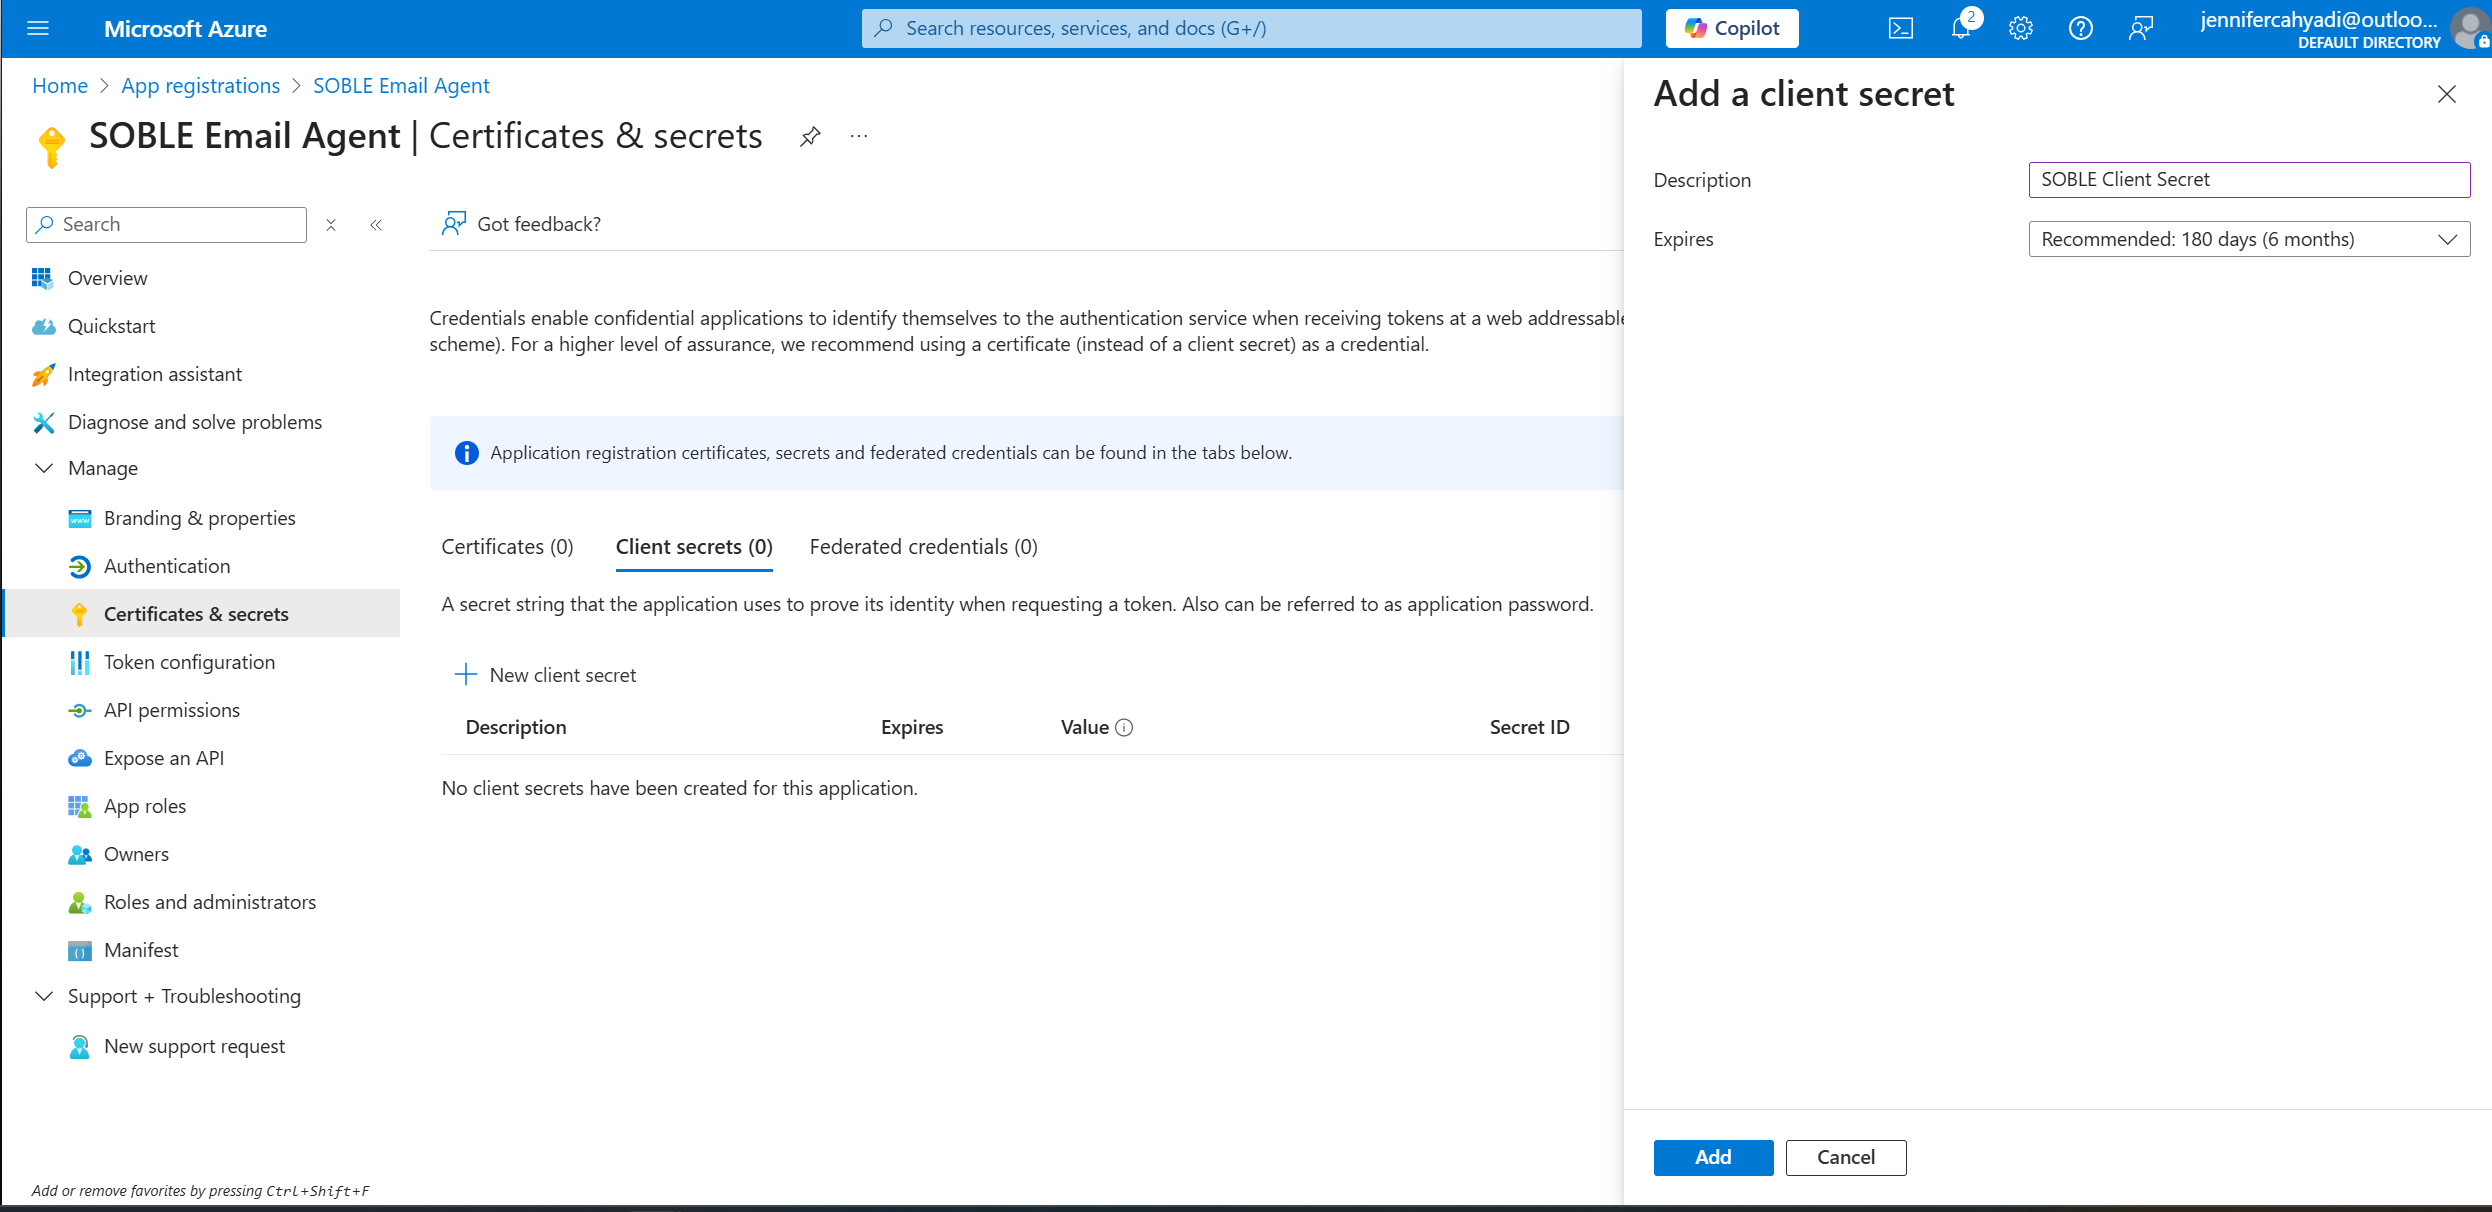
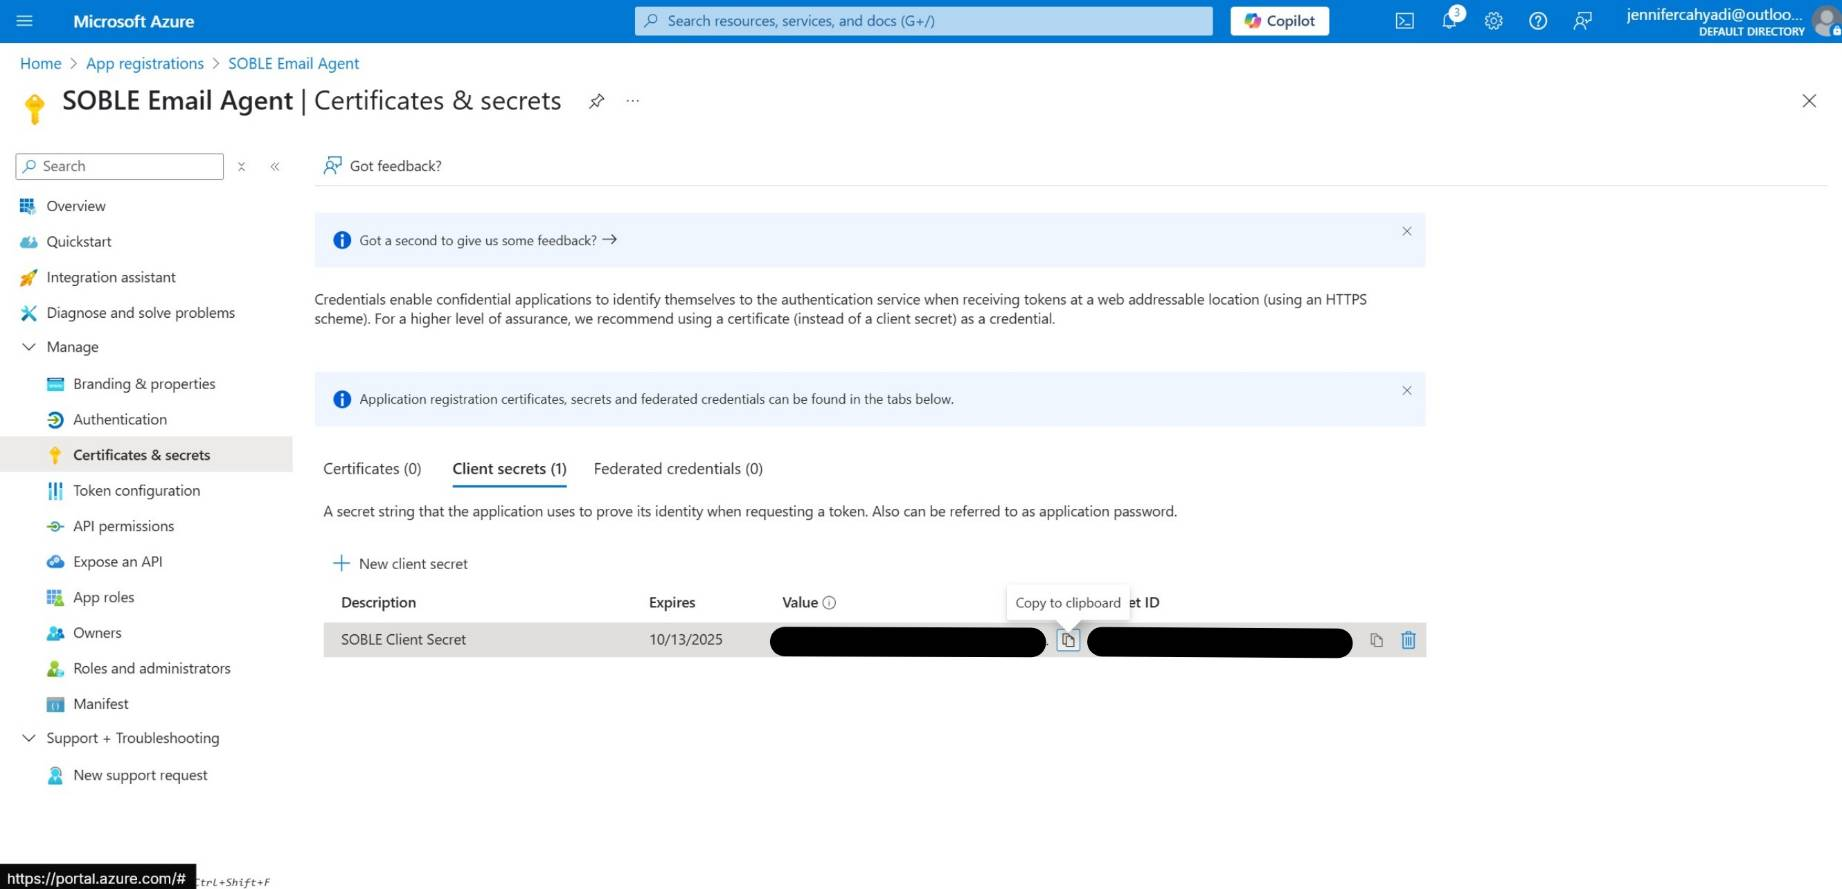
- Create a Secret Key:
- Go to Certificates & secrets.
- Click New client secret, add a description, and choose an expiry period.
- Copy the secret value immediately (it’s only shown once).
This image is generated by author sourced from Microsoft Azure on [Microsoft Azure] (https://portal.azure.com/#view/Microsoft_AAD_RegisteredApps/CreateApplicationBlade/quickStartType~/null/isMSAApp~/false) Microsoft Azure Portal.
- Get Client ID and Tenant ID:
- From the app’s Overview page, copy the Application (client) ID.
- Also, note the Directory (tenant) ID.
This image is generated by author sourced from Microsoft Azure on [Microsoft Azure] (https://portal.azure.com/#view/Microsoft_AAD_RegisteredApps/ApplicationMenuBlade/~/Credentials/appId/6473cda1-0421-4dfd-80d3-236fe1a79222/objectId/7f1b636b-83a5-4610-8177-2f577f061f29/isMSAApp~/false/defaultBlade/Overview/appSignInAudience/AzureADandPersonalMicrosoftAccount/servicePrincipalCreated~/true) Microsoft Azure Portal.
- Set Up Microsoft Credentials in n8n:
- Open your n8n instance and then open your workflow.
- Go to the Microsoft Outlook node and select to the Credentials to connect with parameter.
- Click the Create a new credential
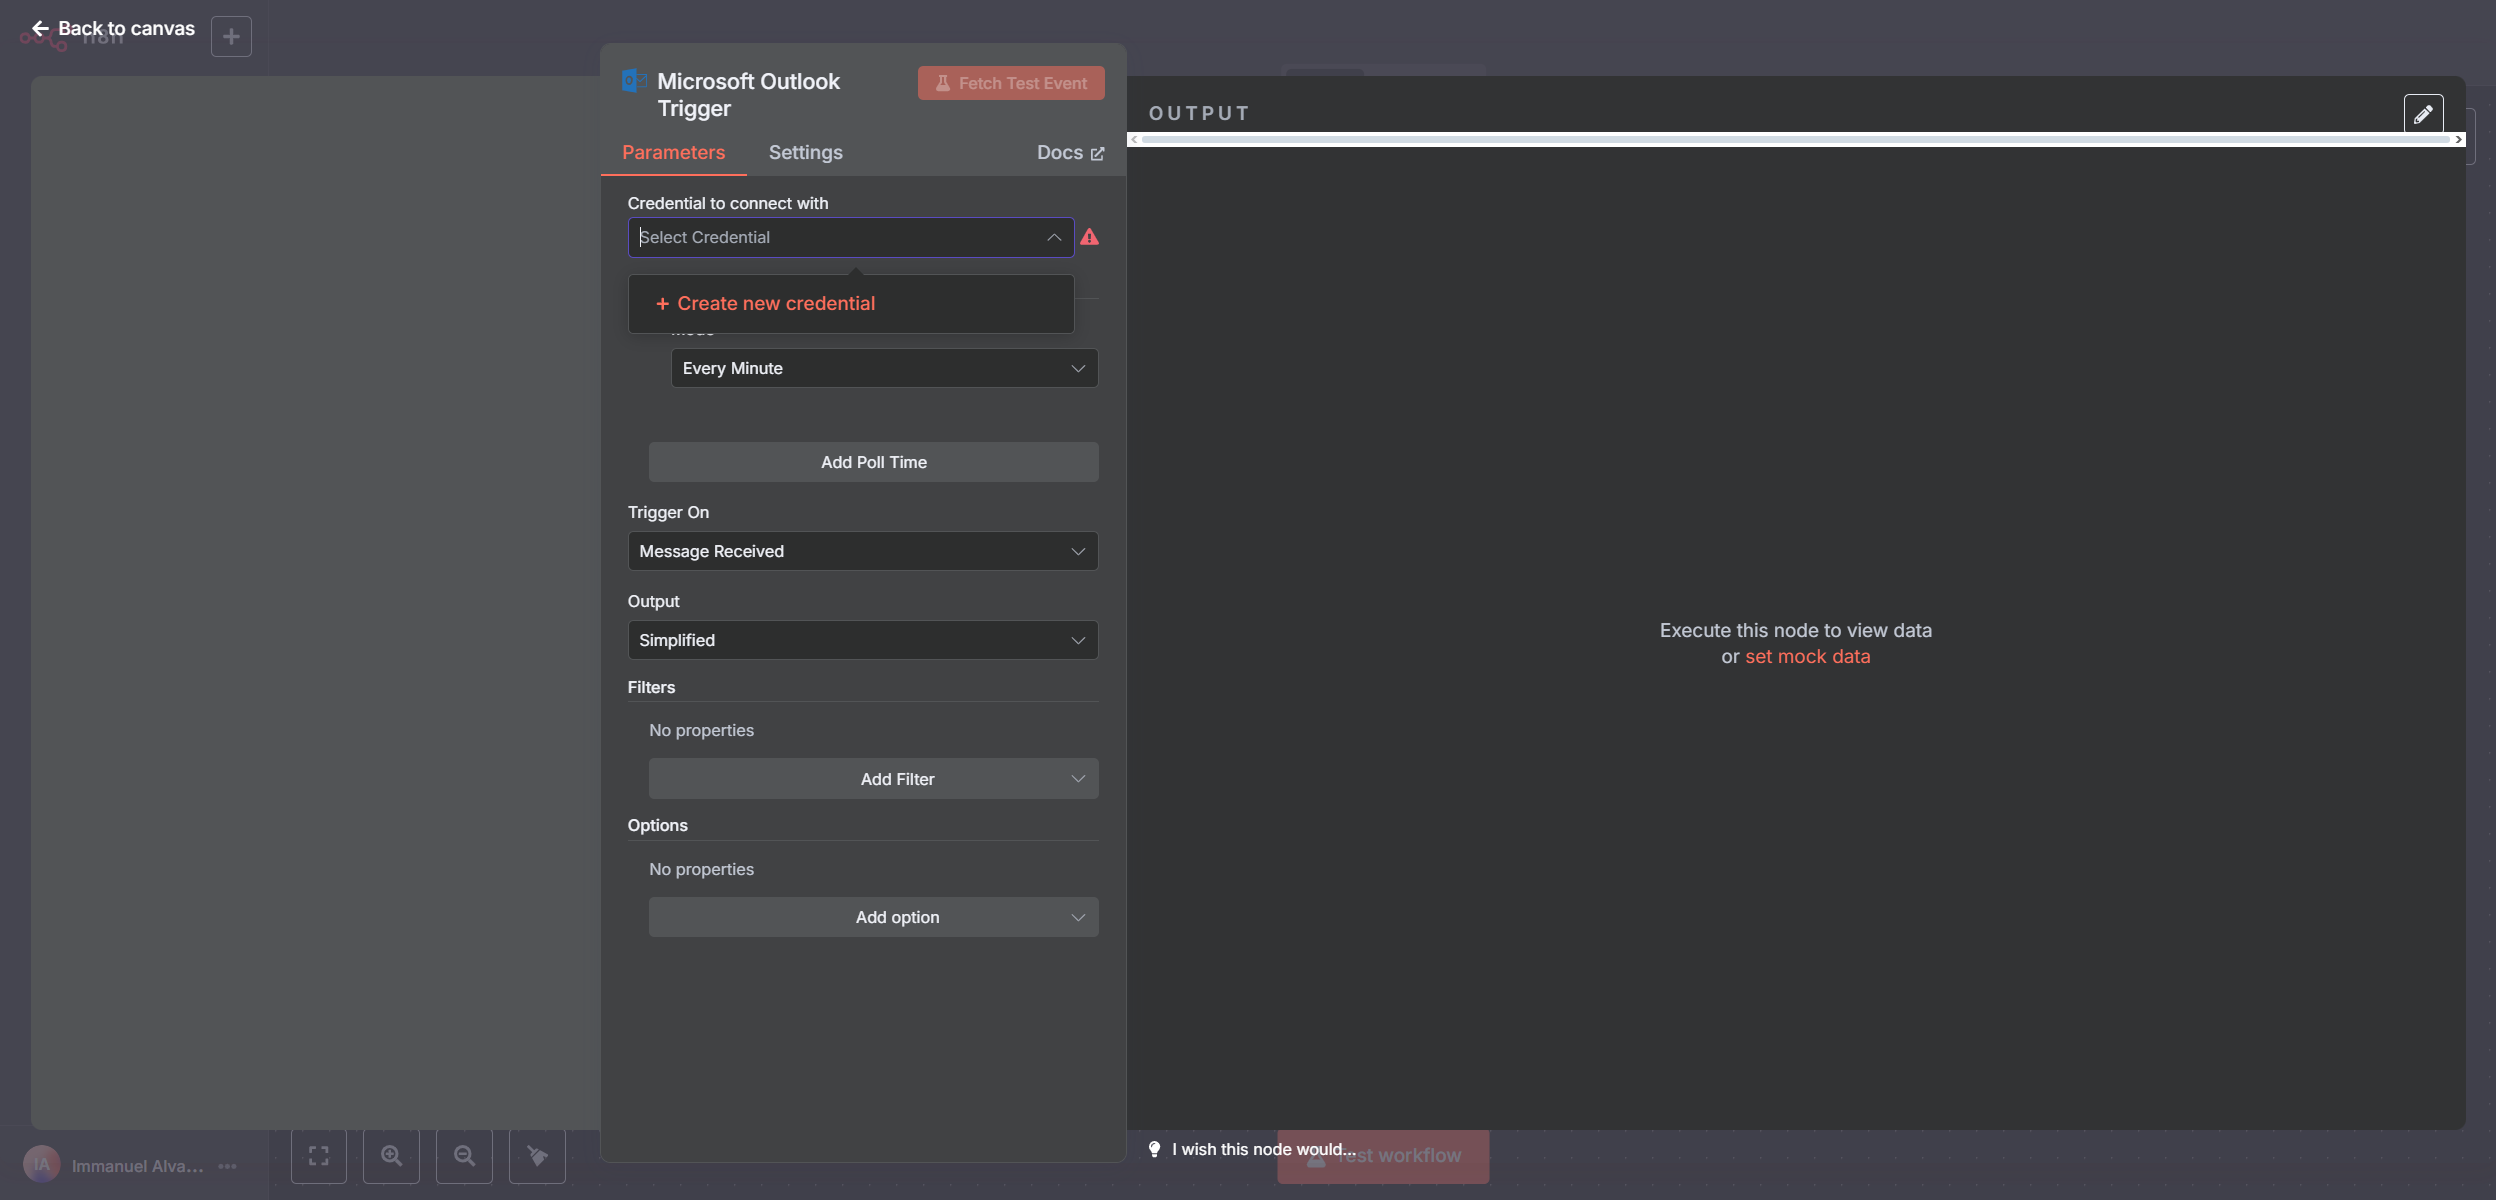
This image is generated by author sourced from n8n localhost
- Fill in your Microsoft App Tenant details in the Microsoft Credentials
- Fill in your Client ID and Client Secret that you have made and then click Save.
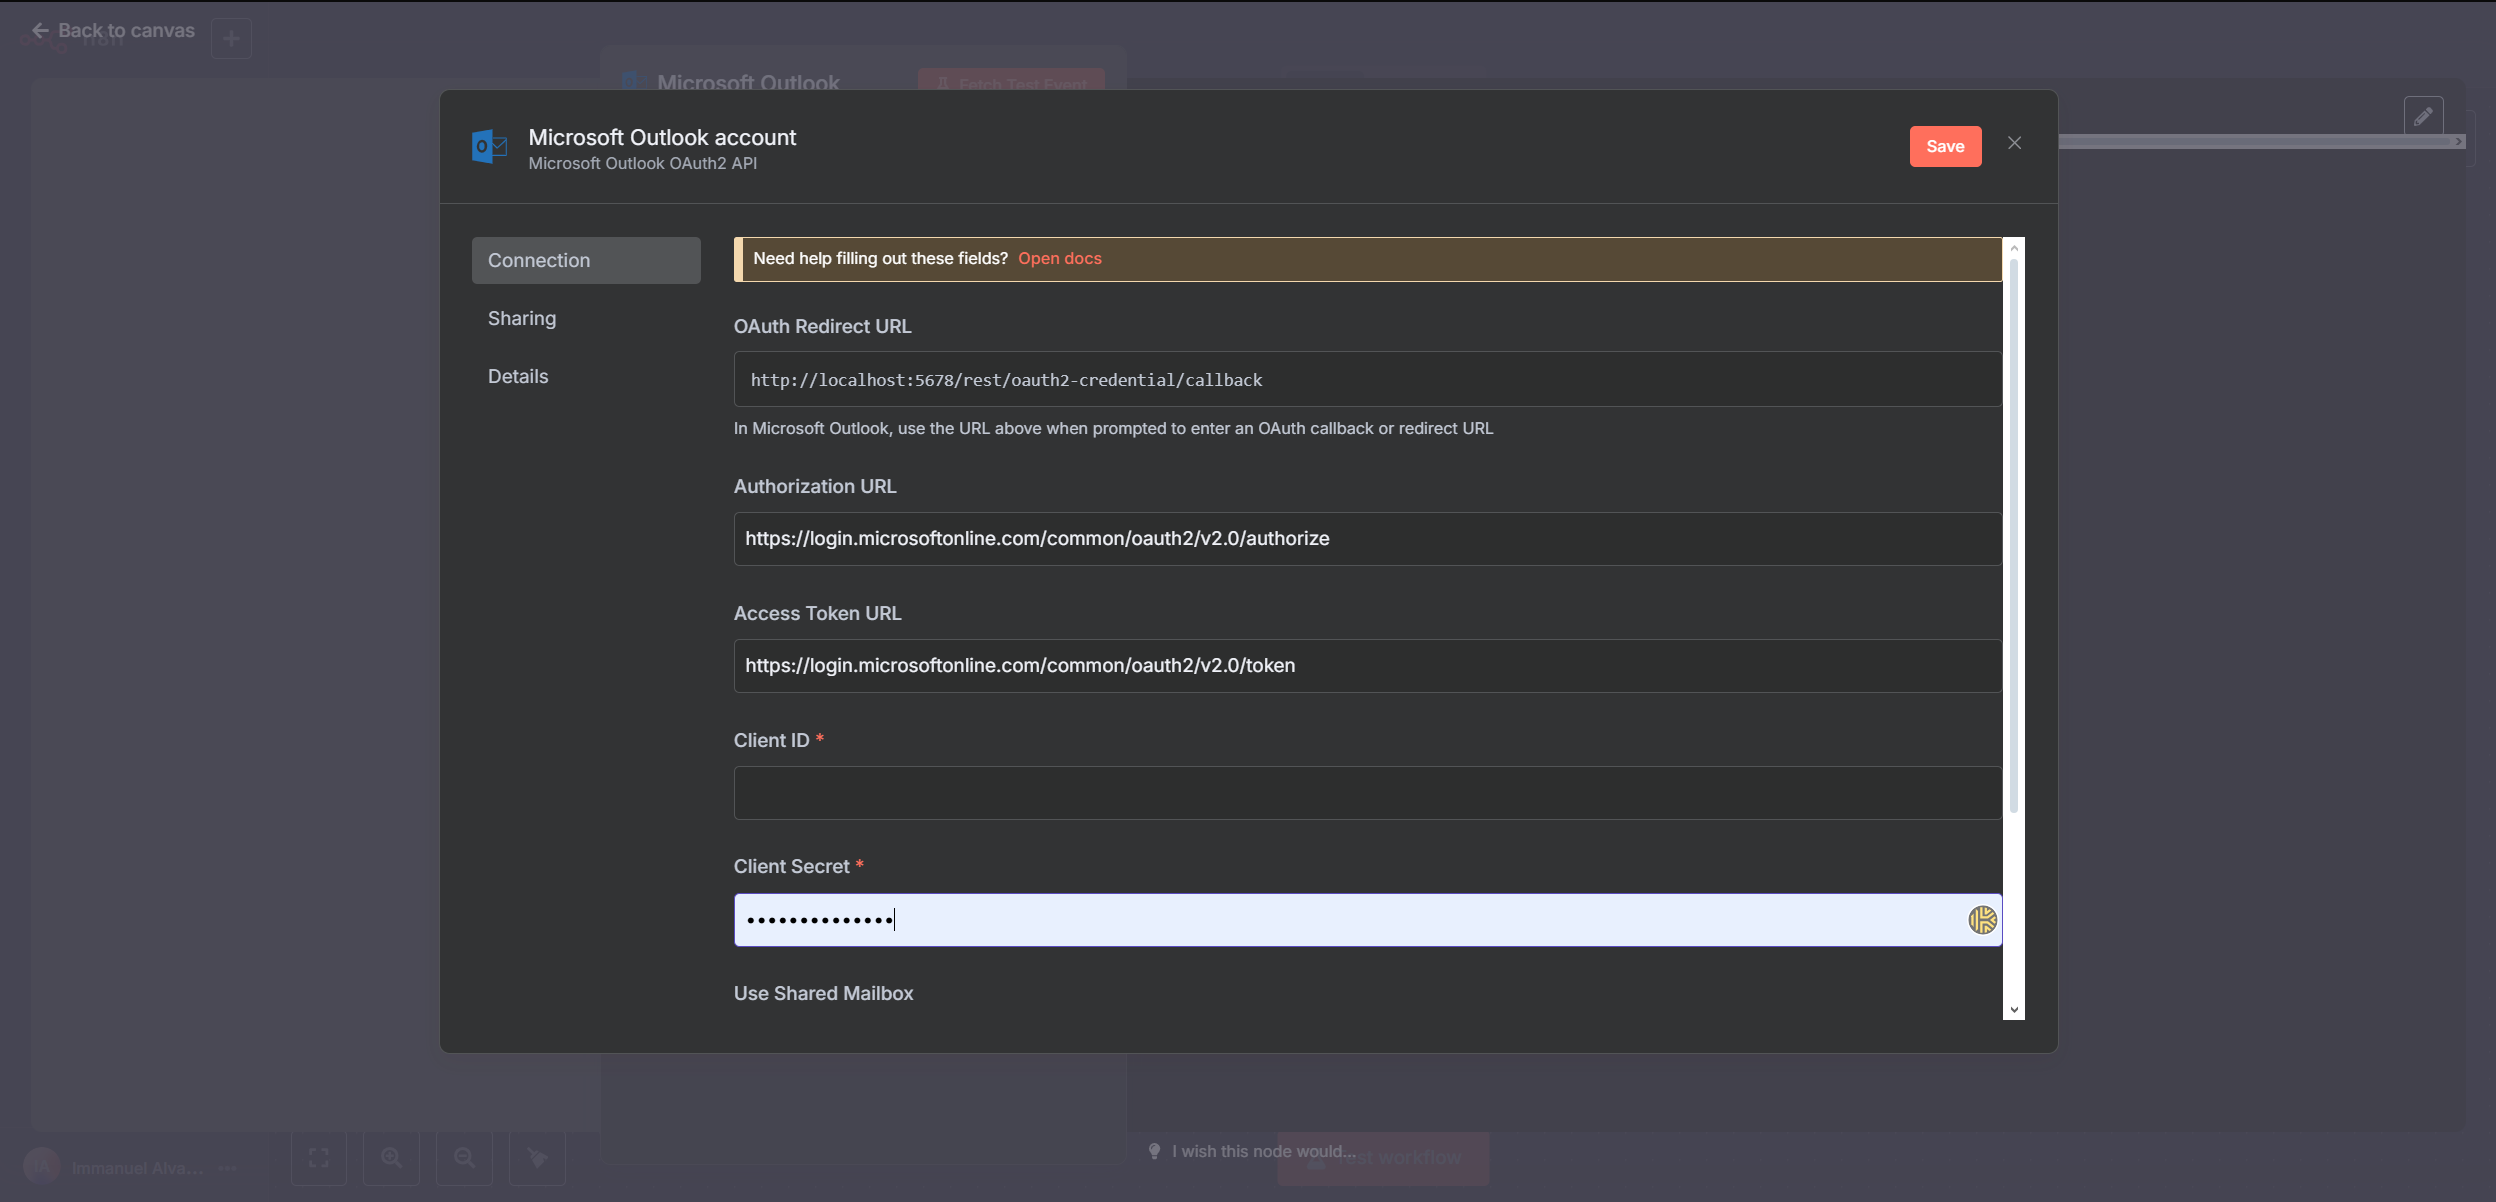
This image is generated by author sourced from n8n localhost
- Connect your Microsoft Account to n8n
- After filling in the Client ID and Client Secret, click Connect my Account
- Then just log in with your Outlook account.
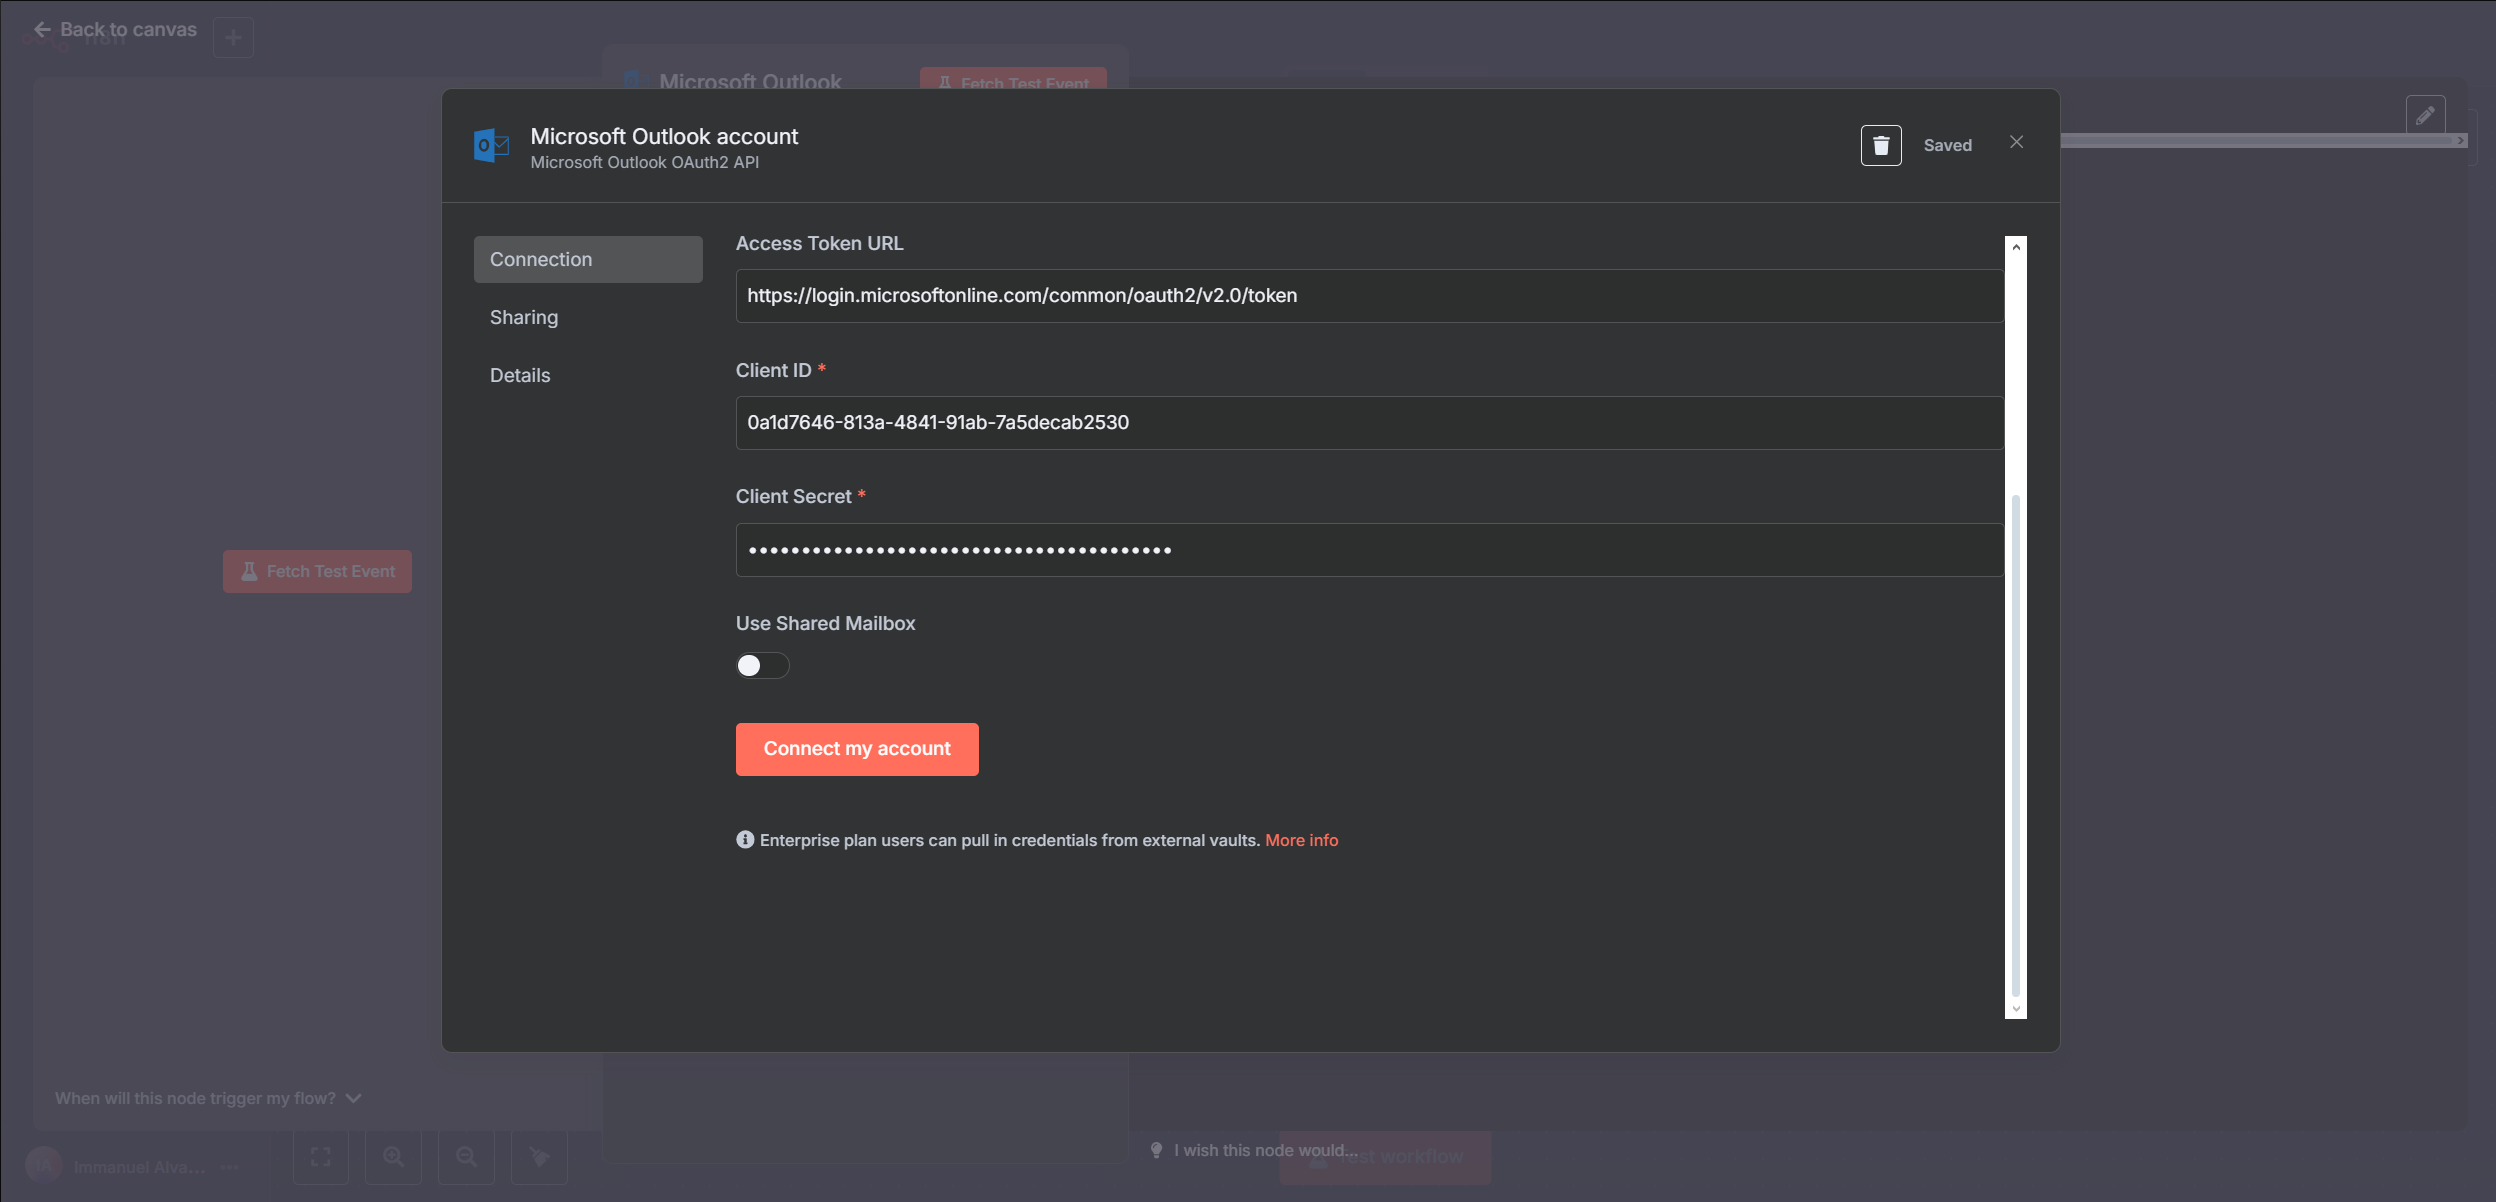
This image is generated by author sourced from n8n localhost
Once completed, your Outlook Trigger node is ready! You can now configure it in your n8n workflow to trigger actions based on Outlook events, like receiving a new email.
Building the Workflow
Step 1: Setting Up the Chat Trigger Node
We’ll start by replacing the manual trigger with the Chat Trigger node, which activates the workflow whenever it receives a new input from the user.
- Launch n8n: Open your local n8n instance.
- Create a New Workflow: Click “New” to begin.
- Add the Chat Trigger Node:
- Click the ‘+’ button on the canvas.
- Search for Chat Trigger and add it.
Once configured, this node will monitor your input from the Open Chat button kick off the workflow whenever a input is detected.
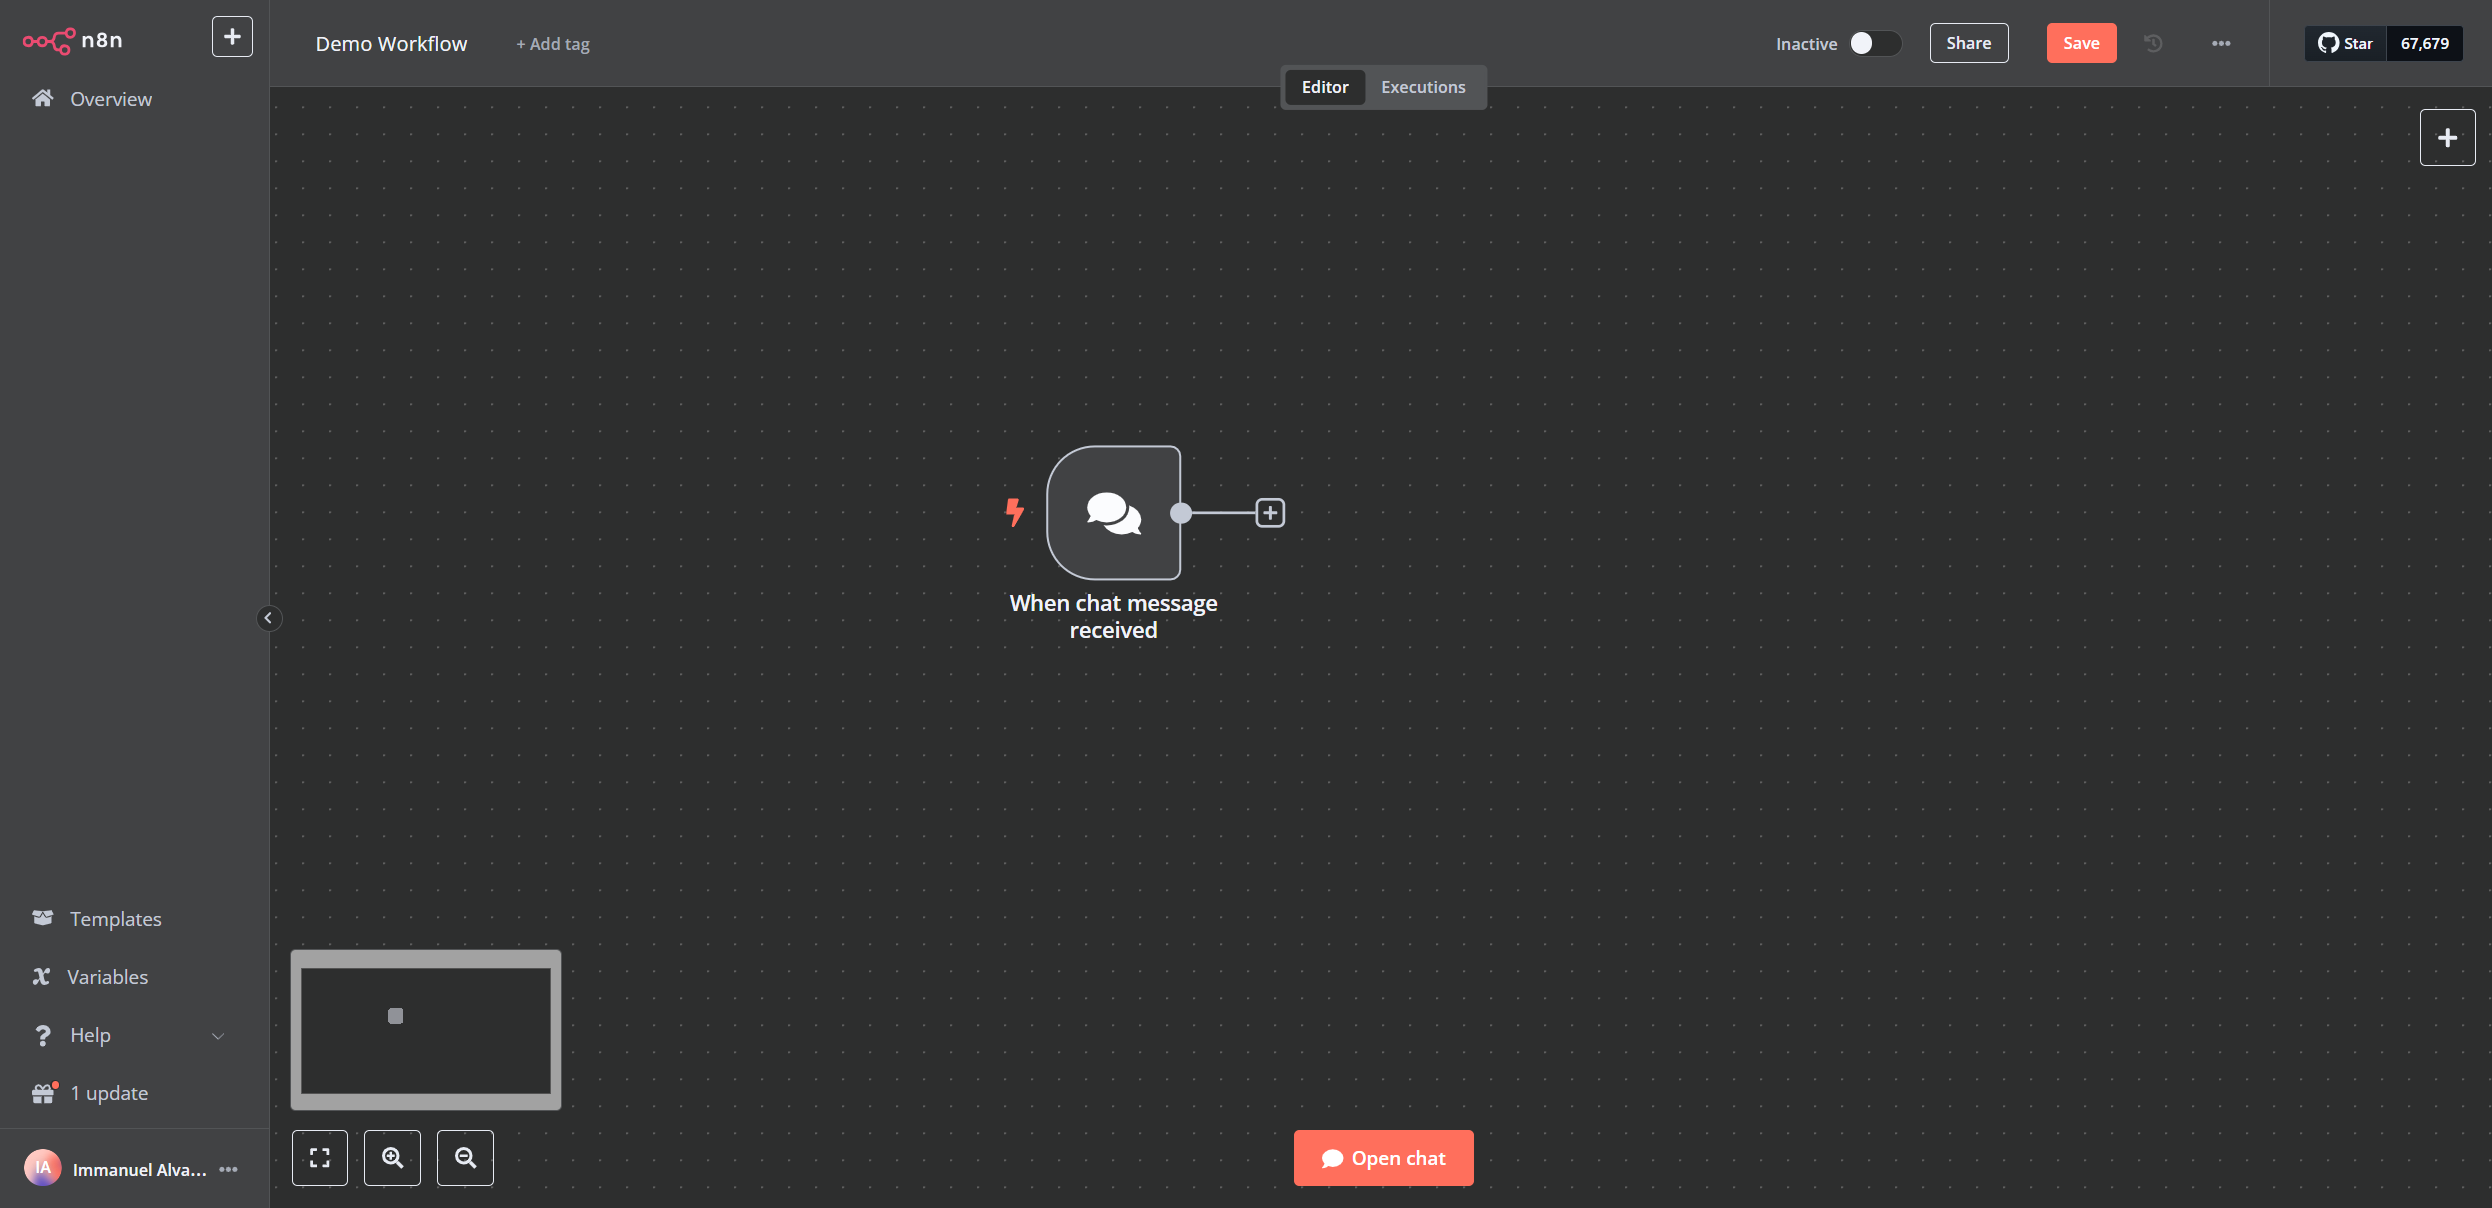
This image is generated by author sourced from n8n localhost
Step 2: Configuring the Main AI Agent Node
Next, we’ll use the AI Agent node to generate a response based on the incoming user input.
- Add the AI Agent Node:
- Click the ‘+’ button and search for AI Agent.
- Add it to the canvas.
- Connect to the Trigger: Drag an arrow from the Chat Trigger node to the AI Agent node.
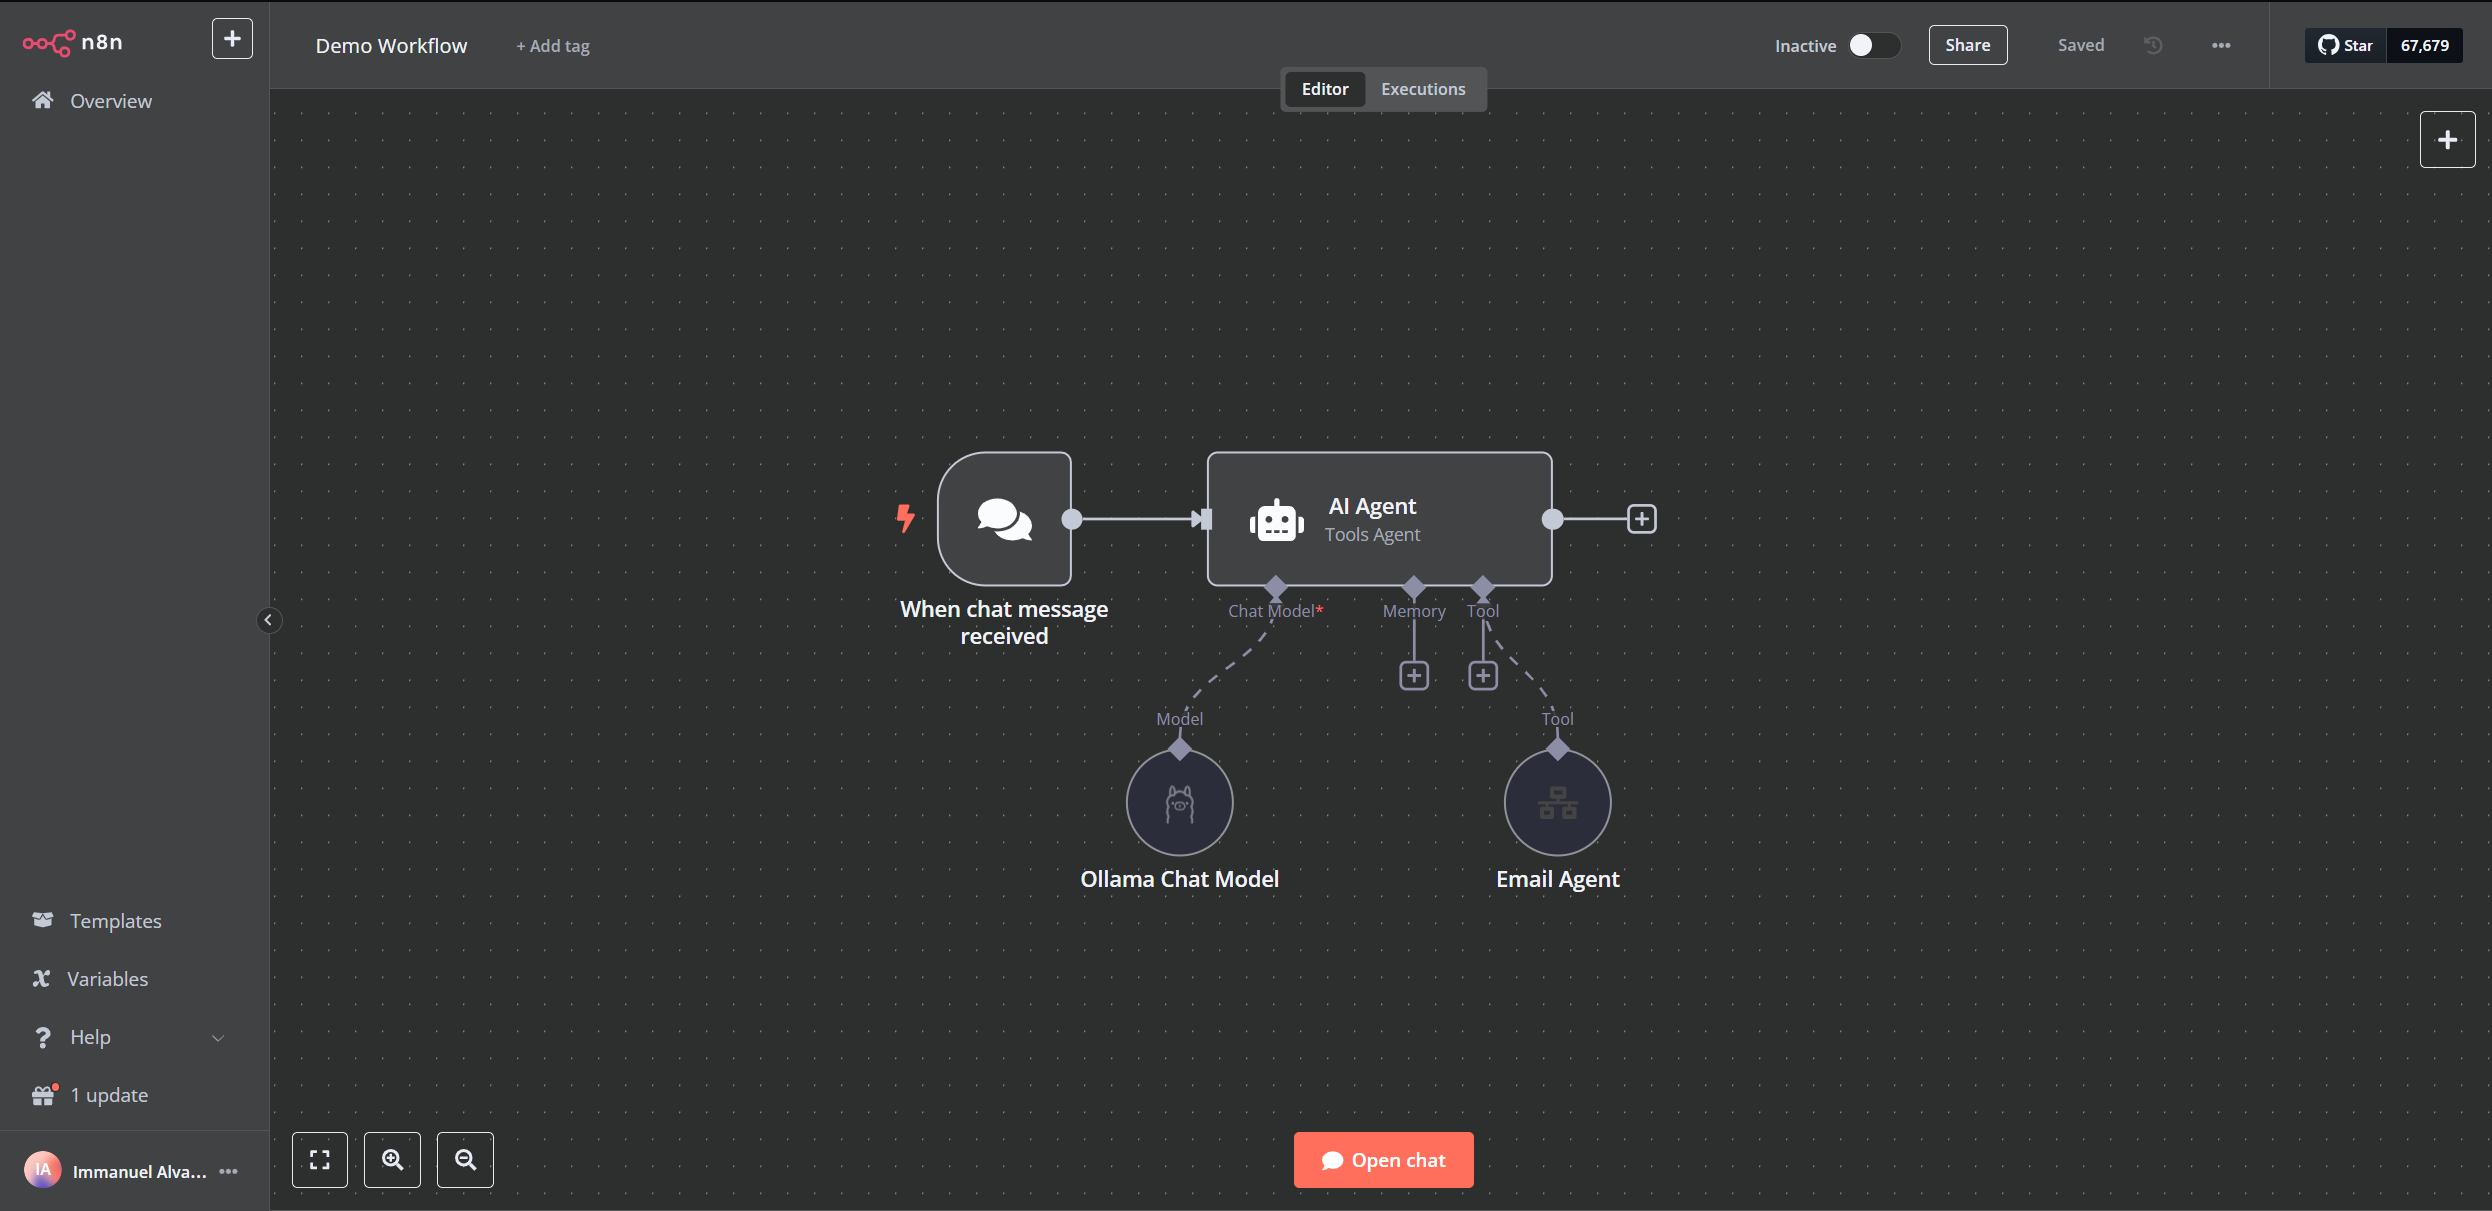
This image is generated by author sourced from n8n localhost
- Set Up the AI Agent:
- Model: Choose your Ollama-hosted LLM (e.g., qwen2.5:1.5b).
- System Message: Define the AI’s role, e.g.:
- “You are an assistant that manages emails and calendar events. Based on the incoming user input, you can:
- Call the ’emailAgent’ tool if the user requests to deal with emails.
- Analyze the user input and decide the appropriate action(s). If booking a meeting, extract the necessary details.
- Tools: Define the sub-agents as tools:
- Email Tool:
- Name: emailAgent
- Description: “Call this tool when dealing with emails (sending emails, replying, etc)”
- Input Schema: to, subject, body.
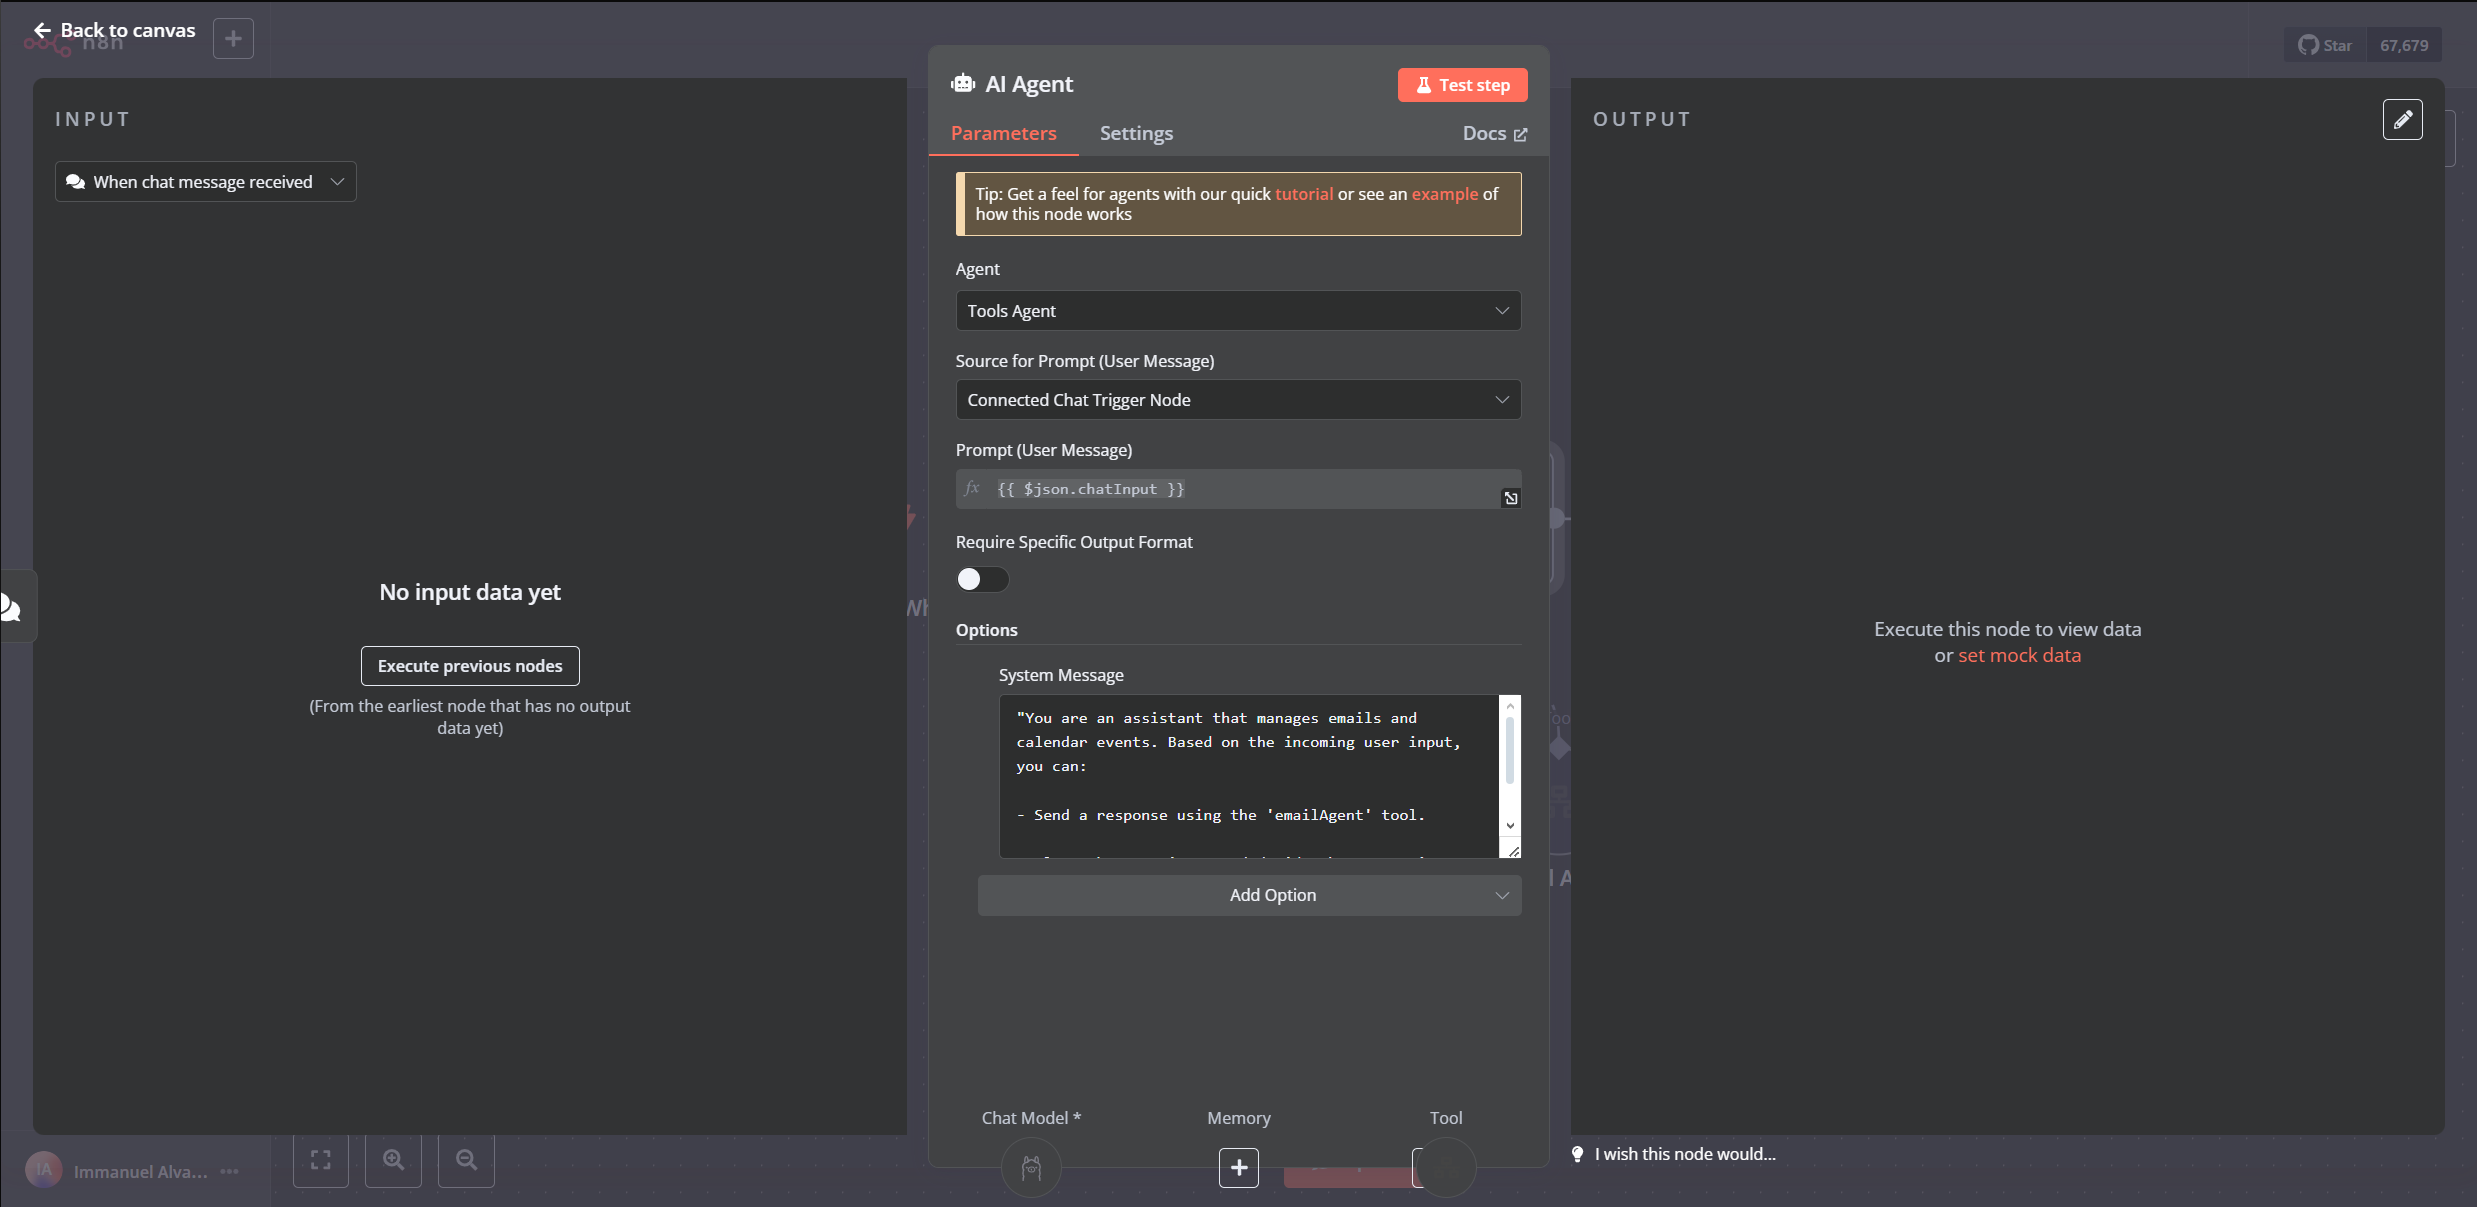
This image is generated by author sourced from n8n localhost
This agent will interpret the user input and call the appropriate tools (sub-workflows) based on its analysis.
Step 3: Setting Up the Email Agent Sub-Workflow
The Email Agent handles sending email responses, triggered by the Main AI Agent.
- Add the tool from the Main Agent to call Email Agent
- In the n8n main Agent, click “Tool” and add the “Call n8n workflow tool”
- Put the name as “emailAgent” as per the system prompt in Main Agent
- On the workflow parameter, make it “From List” & click “Create a New Sub-Workflow”
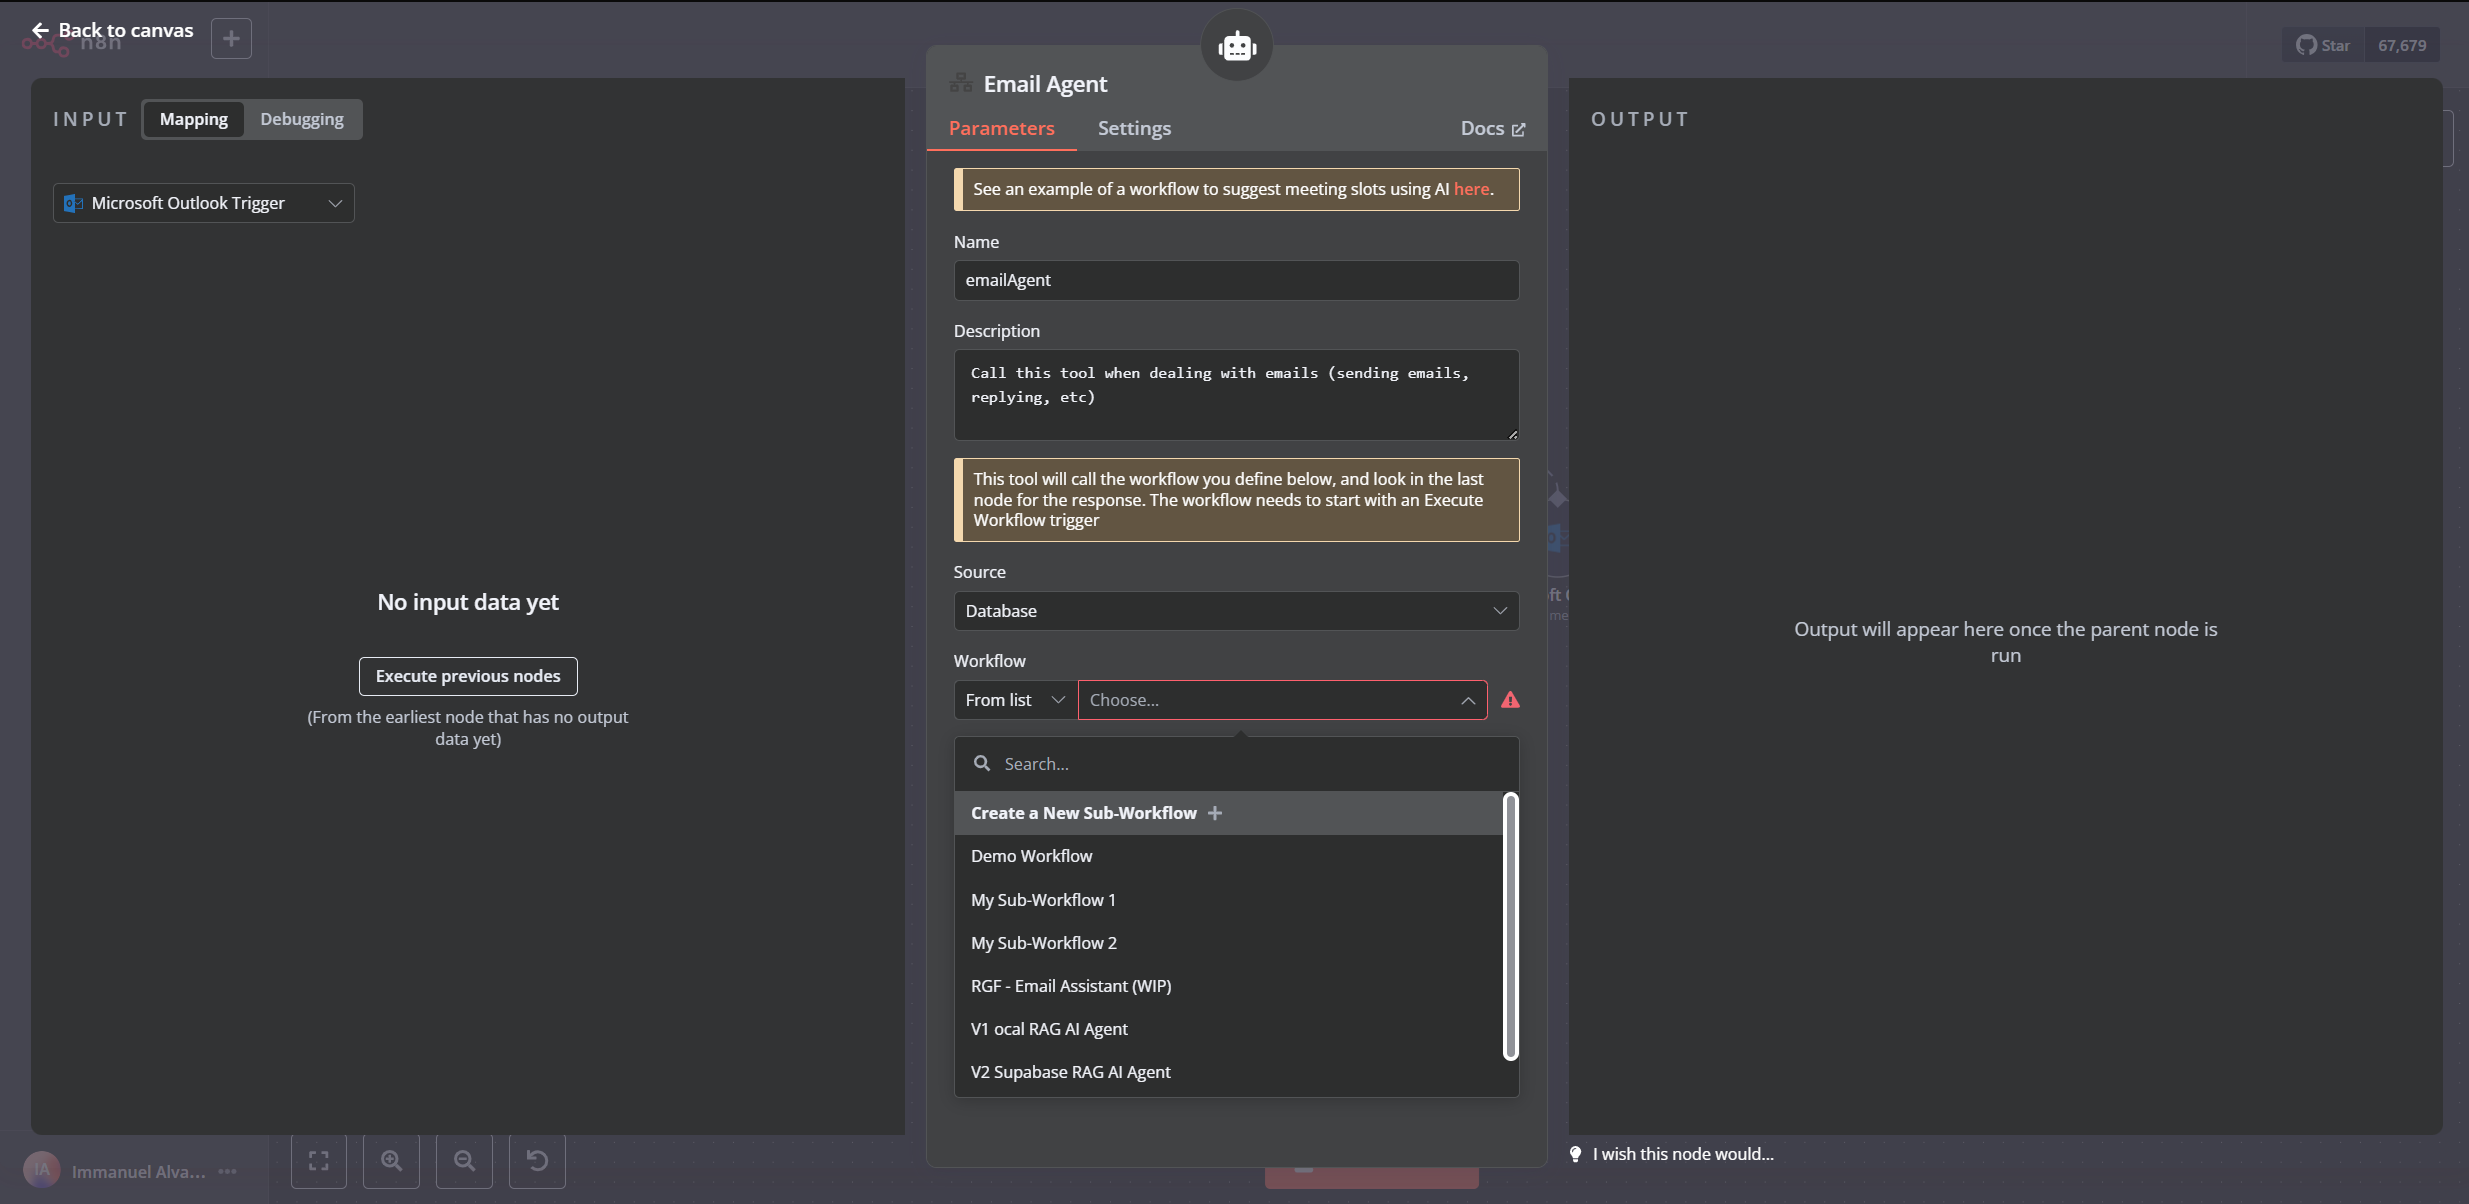
This image is generated by author sourced from n8n localhost
- Configure the “When executed by another workflow” node
- When you get to the new workflow, make sure to set the “input data mode” parameter as “Accept all data”
- Add another AI Agent node:
- Click the ‘+’ button and search for AI Agent.
- Add it to the canvas.
- System Message: Define the AI’s role, e.g.:
- Overview
- You are an email management assistant. All emails must be formatted professionally.
- Email Management Tools
- Use “Send Email” tool to send emails.
- Connect the Nodes:
- Link the AI Agent node to the Outlook node.
- Add an Ollama Chat model node to your AI Agent and select your LLM model there.
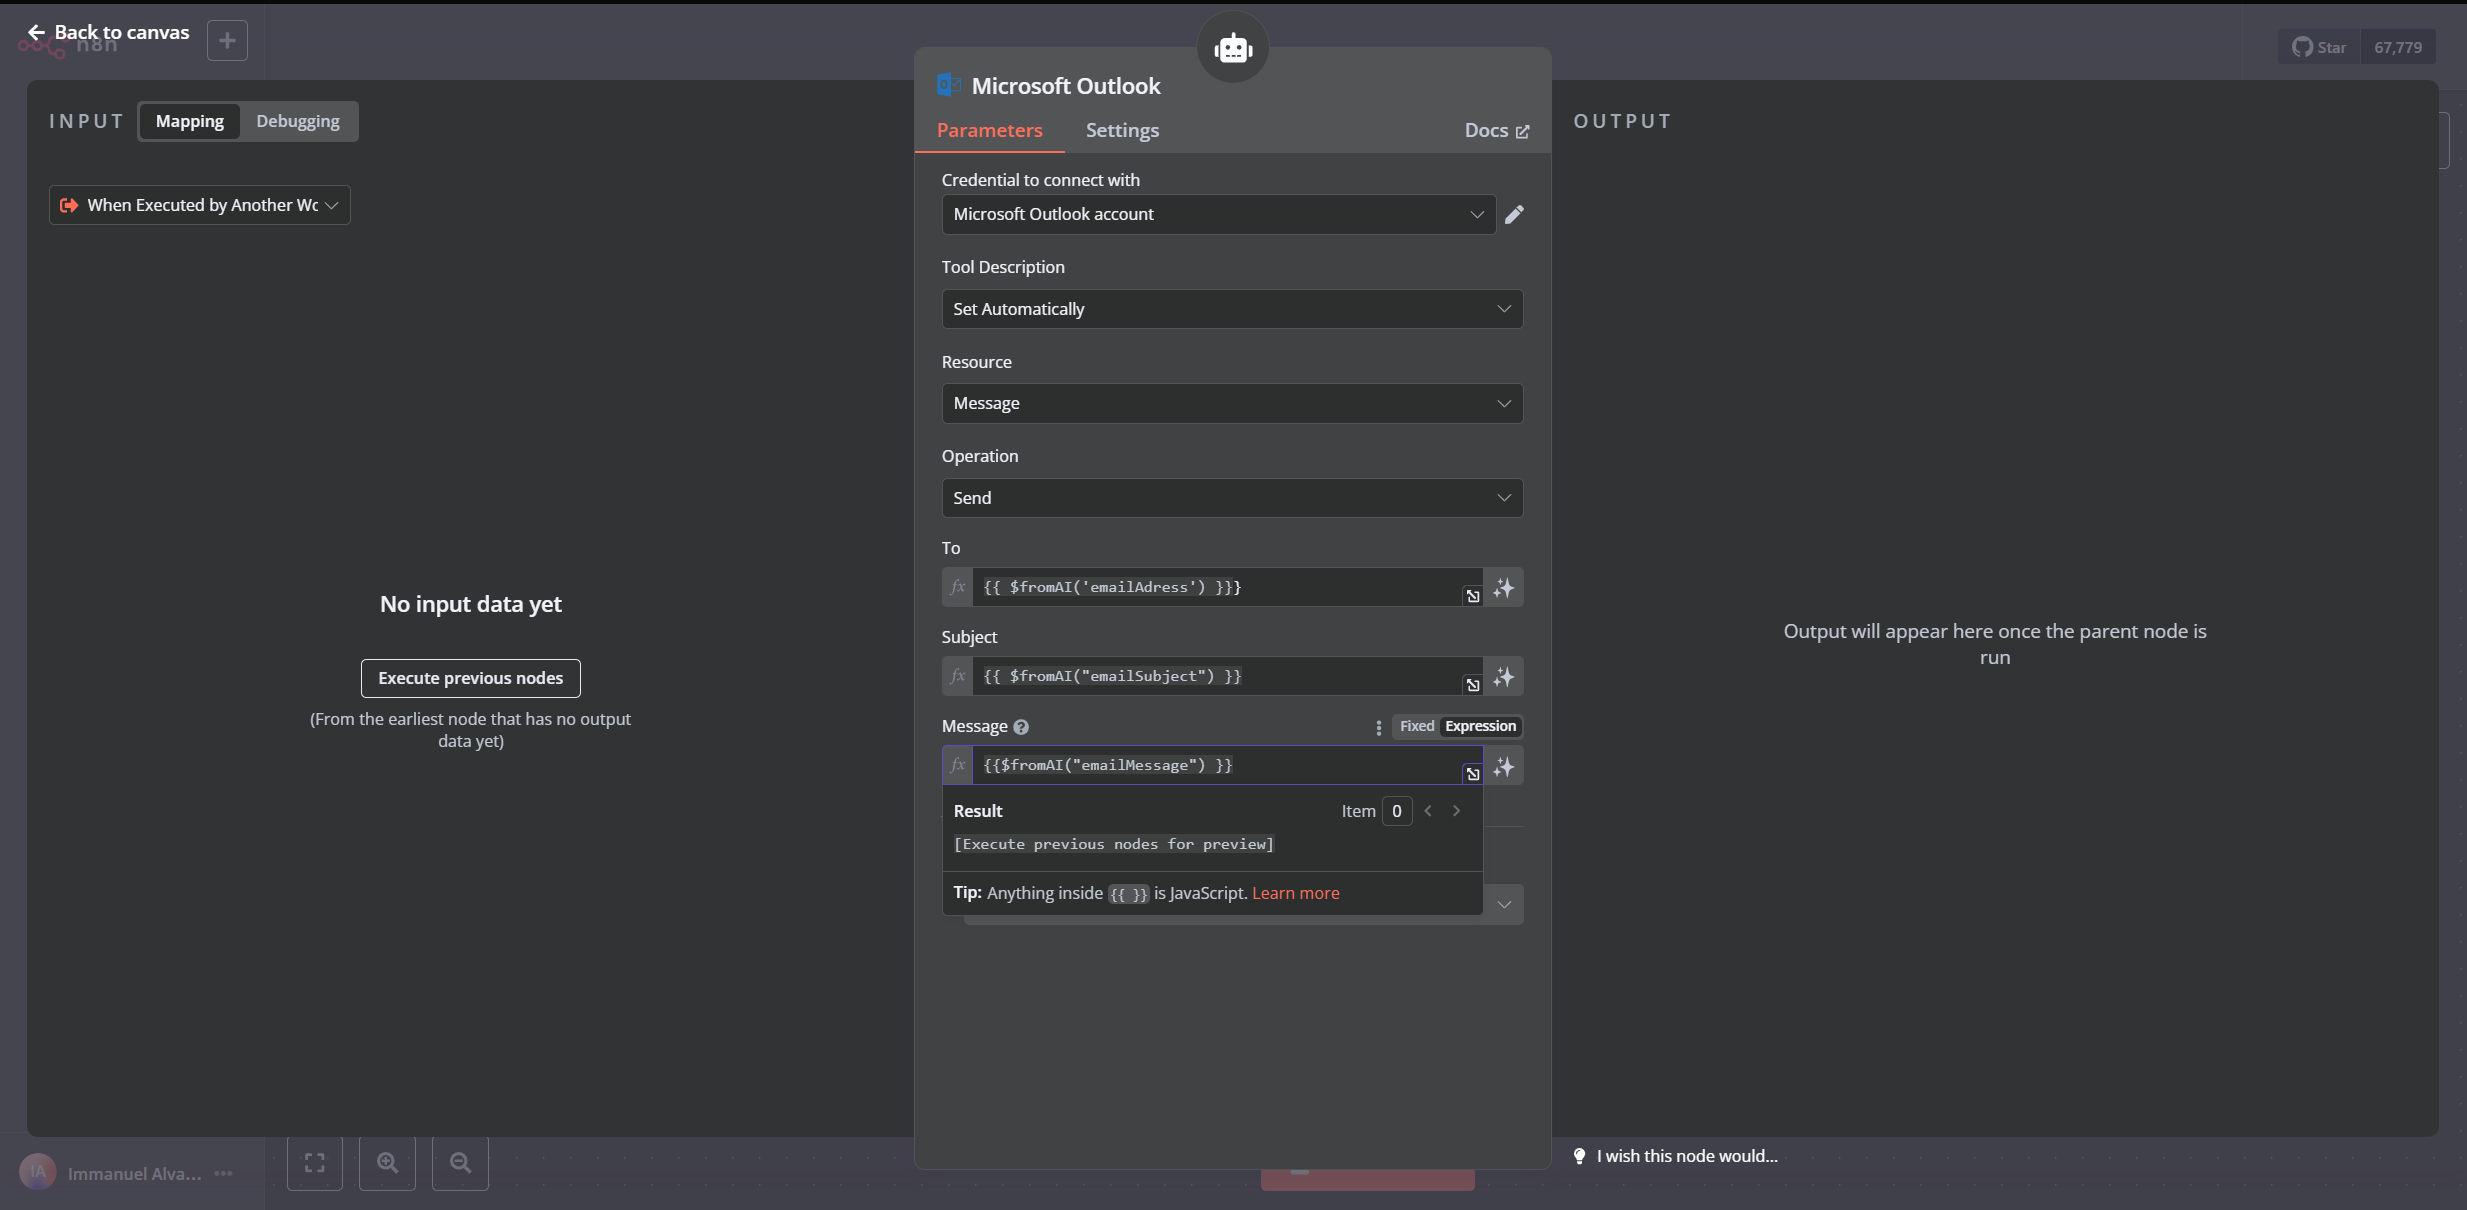
- Configure the Outlook Node:
- Select your Outlook Credential.
- Set the Operation to Send Email.
- To: Reply to the sender with: {{ $fromAI(’emailAdress’) }}
- Note: “$fromAI” means the LLM that is inserted to the AI Agent node will fill this parameter automatically. the “emailAdress” there is to add a small description to help guide the LLM when inputting this parameter.
- Additionally, note that the value type of the parameter needs to be changed from fixed to Expression for this to work. As expression means it will follow a dynamic input instead of a static one.
- Subject: Use the original subject, e.g., {{ $fromAI(“emailSubject”) }}
- Message: Insert the AI output: {{$fromAI(“emailMessage”) }}
- (Optional) Adjust settings like CC, BCC, or attachments as needed.
- Save the Workflow:
- Name it “Email Agent”
- Go back to the Main AI Agent and on the “Email Agent” tool node that you have created and make sure the “workflow” parameter, the workflow name is the same name as “Email Agent”
This image is generated by author sourced from n8n localhost
Testing the Workflow
Time to see it in action!
- Save and Activate:
- Click “Save” to store the workflow.
- Toggle the “Active” switch in the top-right corner to enable it.
- Send a Test Email:
- Insert a user request from the Open Chat node, e.g.:
User Input: “Send an email to [email address] saying how are you feeling today?”
- Insert a user request from the Open Chat node, e.g.:
- Monitor the Workflow:
- The Chat Trigger detects the new user input and starts the workflow.
- The AI Agent generates a response (e.g., “The user wants to send an email to [email address] saying “how are you feeling today?”. Call emailAgent tool to send the email).
- The Outlook node sends the instruction to emailAgent tool.
- Then, the Email Agent Sub-Workflow sends the email
- Verify the Result:
- Check the [email address]’s inbox for the reply.
- Review n8n’s execution logs if anything goes awry.
Troubleshooting:
- No Trigger: Ensure the Outlook Trigger is active and credentials are valid.
- Poor AI Response: Refine the system message or test with a different (stronger) LLM model.
- Email Not Sent: Confirm the Outlook node has Mail.Send permissions and correct settings.
Enhancing the System
This workflow is a solid foundation—here’s how to level it up:
- Filters: Add an If node to respond only to emails meeting specific criteria (e.g., sender domain or keywords).
- Smarter AI: Use a larger LLM or add features like sentiment analysis for tone-appropriate replies.
- Integrations: Extend with nodes like:
- Google Calendar to suggest meeting times.
- Slack to notify your team of key emails.
- Error Handling: Route failed sends to a notification node for review.
Best Practices
- Model Choice: Start with qwen2.5:1.5b, but explore llama3 for richer responses.
- Prompt Design: Tailor the system message for tone and context (e.g., “Always end with ‘Best regards’”).
- Security: Avoid processing sensitive data unless necessary, and test thoroughly.
- Testing: Use a secondary Outlook account to avoid unintended emails during setup.
Conclusion
Congratulations, engineers! You’ve built an automated email system using n8n, Outlook, and an AI Agent. This setup listens for new emails, crafts intelligent replies, and sends them—all hands-free. It’s a glimpse into the power of combining automation and AI for real-world tasks. What’s next on your automation journey? Happy building!