Getting started to join the Hugging Face community

Introduction
The Hugging Face Hub is a collaborative open-source platform that hosts a vast array of models, datasets, and demos for the machine learning community. With its diverse range of accessible models, it caters to various daily work needs. This article will introduce step-by-step instructions on how to use the Hugging Face API and utilise models from the platform in your own applications.
Hugging Face API Tutorial
To use models from the Hugging Face platform in a local application or service with Hugging Face API, users can perform complex natural language processing tasks without needing to delve into the details of model implementation or large-scale dataset training processes. Here, we will give an image-to-text model from Hugging Face Hub as an example to show you how to use it with Hugging Face API.
Step 1: Get your API Token
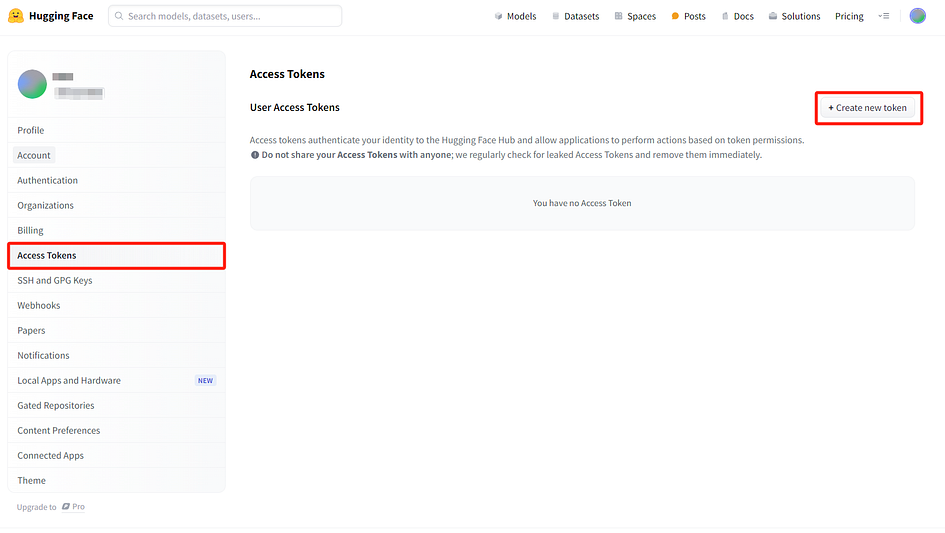
To get started, register or log in to your Hugging Face account first. Next, go to the settings page and click Access Tokens. Next, click Create New Token.
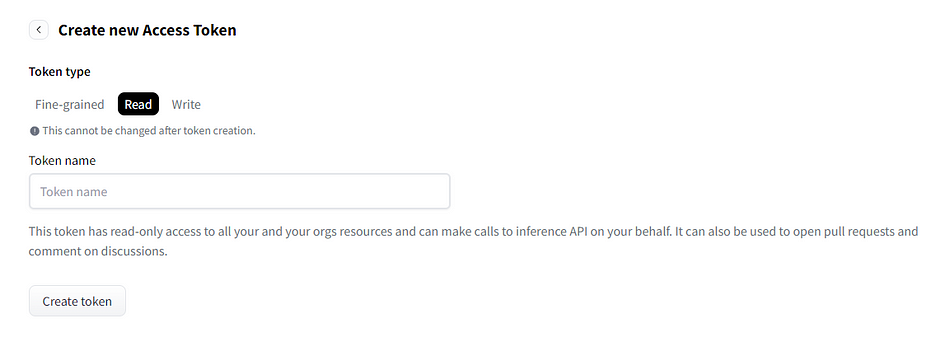
Choose the token type you need. In this example, you can choose read-only access because it is sufficient to open pull requests. Then type your token name in the blank space. Here, we type “image-to-text” as our token’s name since we will use an image-to-text model in this example later.
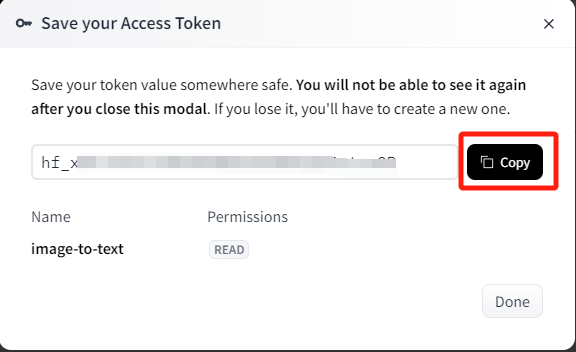
After the token is created, don’t forget to copy your API token and save it to a safe place. You won’t be able to access it again after you click done.
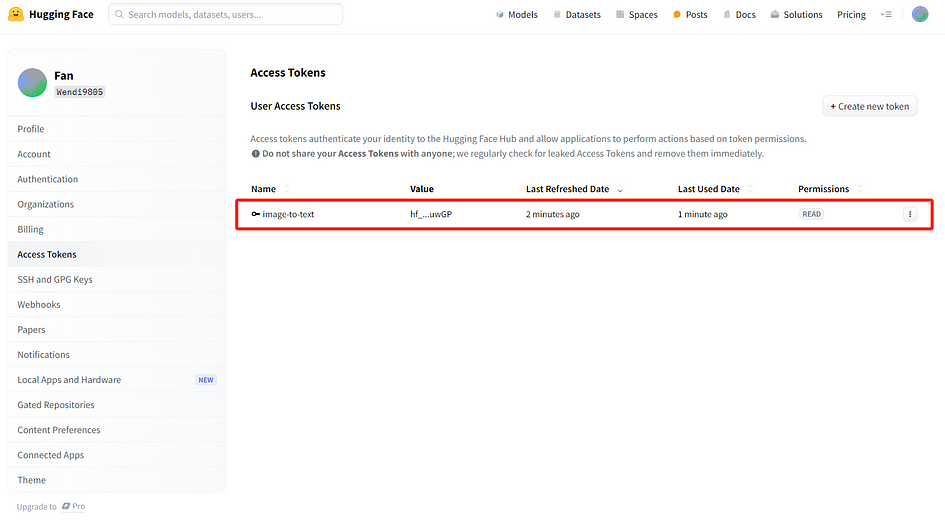
You can find the created token here.
Step 2: Choose a model you like
Go to the main page of Hugging Face, then click Models.
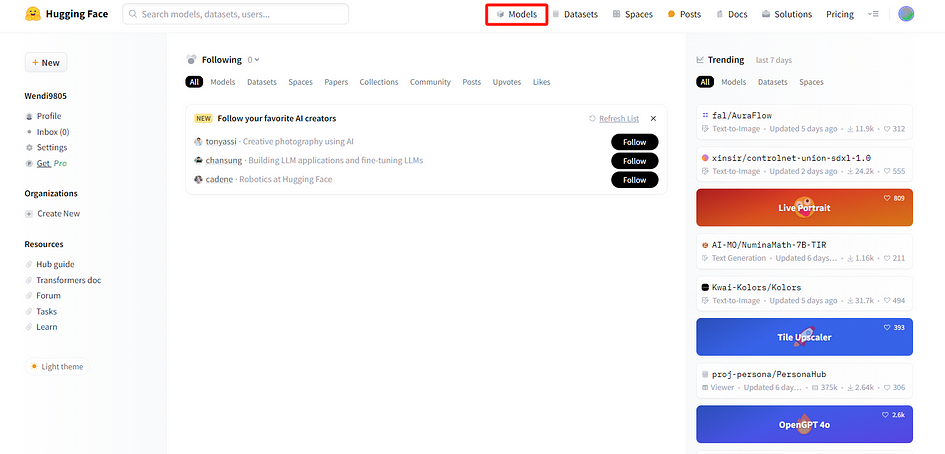
On the next page, there are thousands of different models you can use. You can sort the models based on the function you need on the left side. You also can type the names of models to search for them.

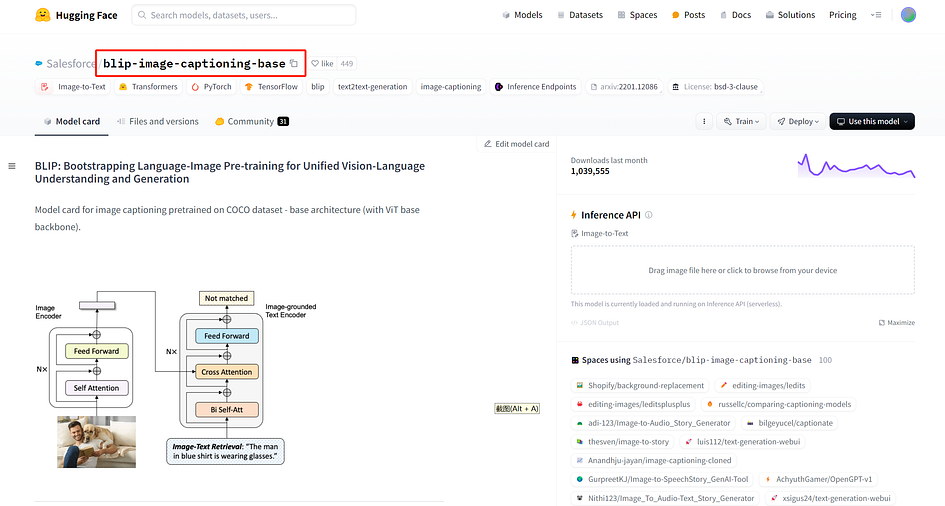
Here, we use an image-to-text model called “blip-image-captioning-base” as an example. This AI model can describe the content of the image you provide. You can also use other models you like.
Step 3: Run the model in your application.
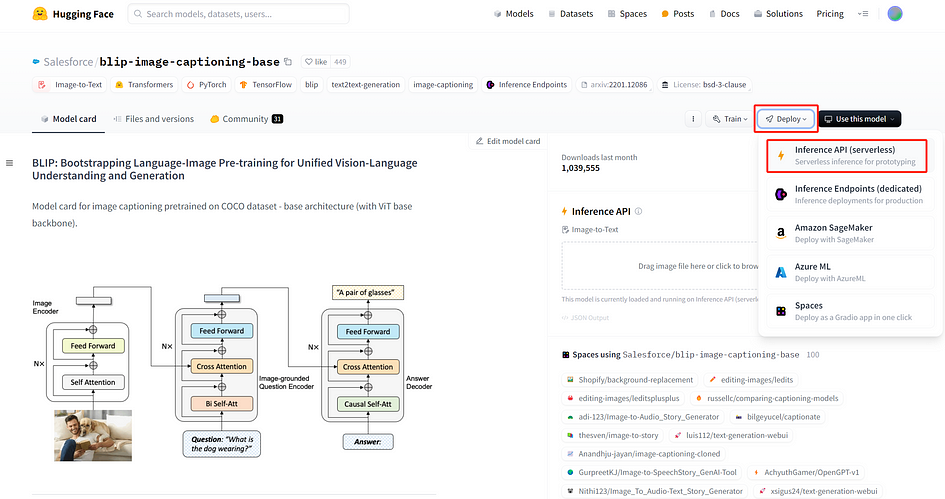
Using this model in your own app is quite easy. Here, we need to set up the API in your code. On Hugging Face, the model will provide the direct code to use it. First, you need to click Deploy on this page then click Inference API (serverless).
In the next window, you can choose any programming language you like. In this example, we choose Python as an example.
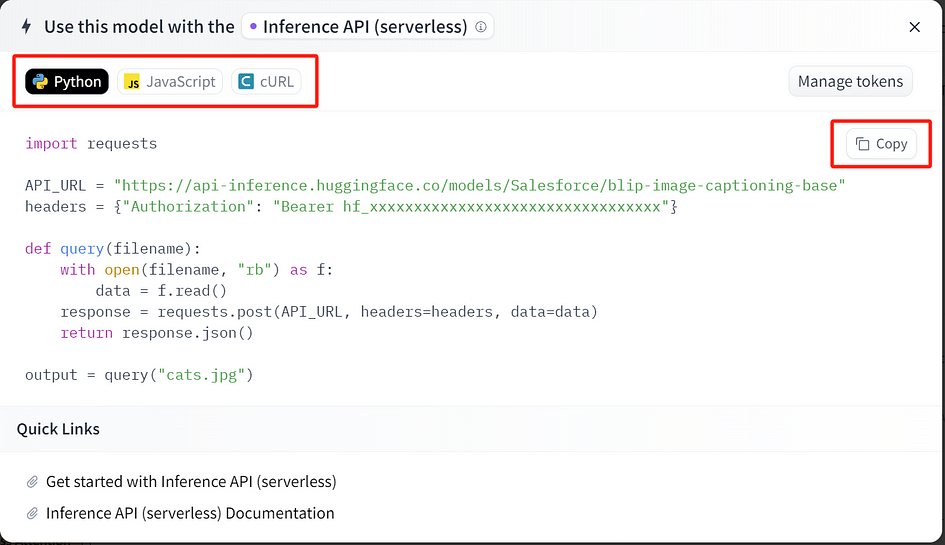
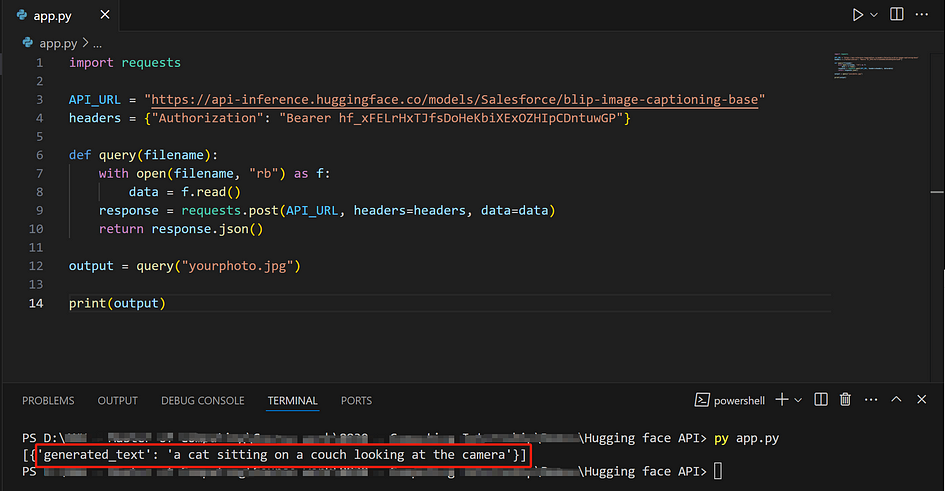
Here is the code we use. You need to replace the “hf_xxxxxxxxxxxxxxxxxxxxxxxxxxxxxxxxxx” token with yours. Then, you can insert this code into your own program.
import requests

API_URL = "https://api-inference.huggingface.co/models/Salesforce/blip-image-captioning-base"headers = {"Authorization": "Bearer hf_xxxxxxxxxxxxxxxxxxxxxxxxxxxxxxxxxx"}def query(filename):    with open(filename, "rb") as f:
        data = f.read()
    response = requests.post(API_URL, headers=headers, data=data)
    return response.json()

output = query("yourphoto.jpg")
print(output)
In this example, we used this cat photo as our input.

Then run the code using the command below and get the result from our Hugging Face model. Don’t forget to change “app” to your file name. The result says “a cat sitting on a couch looking at the camera”, which is an accurate and good description.
py app.py
Of course, we can enhance the input for our model by incorporating a UI, making it more visually appealing and user-friendly. However, the primary goal of this article is to share how to use the Hugging Face API, so we will not delve further into this topic.
Conclusion
The Hugging Face API offers a powerful and efficient tool, enabling us to integrate thousands of pre-trained, mature models into our own software applications. This article provides a detailed guide on how to use the API, aiming to enhance the productivity of our user community. However, since anyone or any institution can upload their models to the platform, it is important to be mindful of the quality and accuracy of the models you choose, as they might impact your results.
References
- Technical Support Documentation for Hugging Face — Get Started. Read me.
About the Author